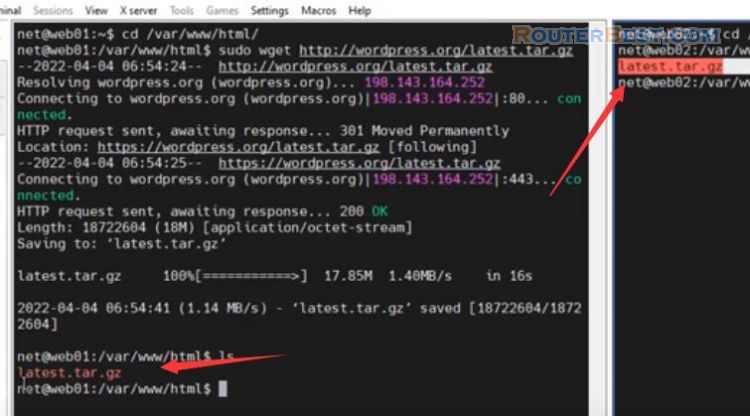
This article shows you How to load balance your WordPress website. With this method, when one of the two servers has a problem, your website will still work fine. Also, when both servers are in normal state, they will share the load to make your website perform better. The two web servers will automatically synchronize data with each other.
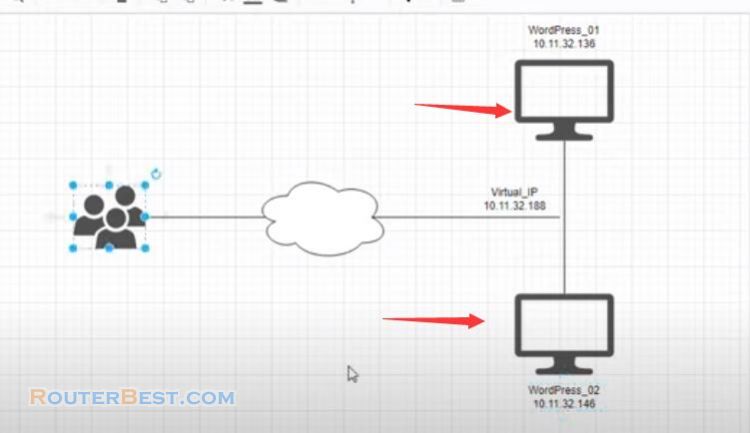
In this article I use Ubuntu OS for two servers. I use Wordpress to build my website. The two servers have ip addresses 10.11.32.136 and 10.11.32.146. The virtual ip address is 10.11.32.188.
You first configure the load balancer with haproxy.
Load balancing
HAproxy used to load balance two servers, and keepalived used to generate virtual ip address 10.11.32.188.
sudo apt update && sudo apt upgrade -y
Apache is web server software.
sudo apt-get install apache2 keepalived haproxy -y
Keepalived
You open the sysctl config file.
sudo nano /etc/sysctl.conf
And add a line like I'm doing. You edit the sysctl configuration file on both servers, and add this line at the end of the file.
net.ipv4.ip_nonlocal_bind=1
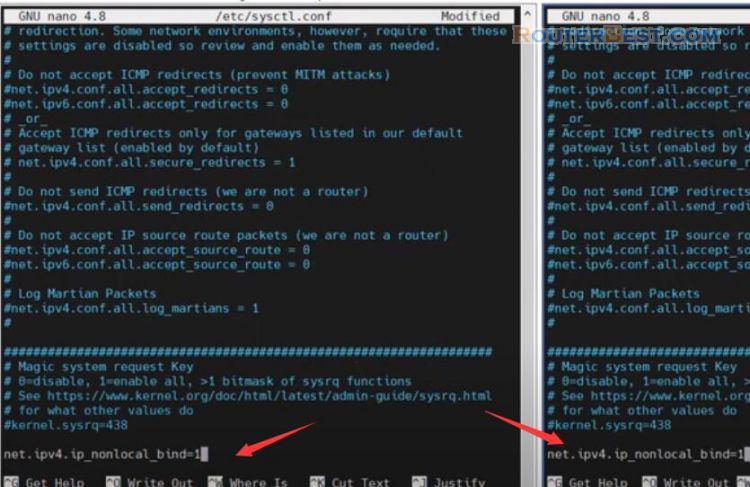
Then use Ctrl X to save and exit.
Next, you create a keepalived configuration file on both servers and configure it.
sudo sysctl -p
sudo nano /etc/keepalived/keepalived.conf
You notice the different information between the two keepalived configuration files on the two servers. You configure server one priority to be 100 and server two to be 99. With such a priority configuration, the first server is always given priority to use the virtual ip address.
Next, you configure the first server to be MASTER, and the second to be the BACKUP server. And of course you configure virtual ip addresses for the two servers. This virtual ip address needs to be the same on both servers. As said at the beginning of the article, the virtual ip address used in this article is 10.11.32.188.
In order for two servers to be able to exchange information, you must set the same password on both servers. Here I set the password to 123456. Also, you need to configure your network card to assign virtual ip address to them.
global_defs {
  router_id web1,web2
}
vrrp_script chk_haproxy {
  script "killall -0 haproxy"
  interval 2
  weight 2
}
vrrp_instance VI_1 {
  virtual_router_id 51
  advert_int 1
  priority 100,99
  state MASTER,BACKUP
  interface ens33
  virtual_ipaddress {
    virtual_ip dev ens33
  }
 authentication {
     auth_type PASS
     auth_pass 123456
     }
  track_script {
    chk_haproxy
  }
}
After correctly setting up the necessary information you save and close the keepalived configuration files on the two servers. Now you start keepalived service and see the result.
sudo service keepalived start
With a higher priority than the first server being used, the virtual ip address 10.11.32.188. If you stop the keepalived service on the first server, the second server will be assigned a virtual ip address 10.11.32.188. So when the first server has a problem, the virtual ip address will be assigned to the second server. Until the first server fixes the problem, the virtual ip address will automatically be reassigned to the first server.
Change Apache port
Because haproxy service uses port 80 so you need to change the default port of apache. By default apache listens to port 80, in this example I will replace it with port 8080. You can change another port if you want.
sudo nano /etc/apache2/ports.conf

Letting apache and haproxy use the same port 80 will raise an error. Next you change port 80 to 8080 with the default configuration file of apache.
You change the port of apache on both servers.
sudo nano /etc/apache2/sites-available/000-default.conf

Restart apache
sudo systemctl restart apache2
Open your web browser and check if you changed it correctly. So I changed the port for apache, next step will explain you how to load balance with two servers.
HAproxy
I will modify the apache default site content on both servers so you can better see the results after load balancing. I will create a simple message so you know which server you are currently accessing.
sudo nano /var/www/html/index.html

You configure haproxy on each server.
sudo nano /etc/haproxy/haproxy.cfg
If you configure it on both servers at the same time, it will cause an error because the virtual ip address belongs to only one server at a time. Because the first server has a virtual ip address, so I configured haproxy on the first server.
frontend http-in
        bind *:80
        default_backend app
backend static
        balance roundrobin
        server static virtual_ip:80
backend app
        balance roundrobin
        server web1 web1_ip:8080 check
        server web2 web2_ip:8080 check
You add the configuration lines and update the virtual ip address. Then add the ip addresses of the two servers, pay attention to update port 8080 for both servers. If you used a different port for your two servers in the previous step, update accordingly. Like this example, the virtual ip address is 10.11.32.188, the ip address of the first server is 10.11.32.136, the ip address of server two is 10.11.32.146.

After the configuration is complete, restart the haproxy service.
sudo service haproxy restart
At this step, you access your website with a virtual ip address. When you refresh your web browser, you will be accessing two different servers. The change line will let you know, and as you can see, users will have access to two different servers in turn. So your site is load balanced with two servers.
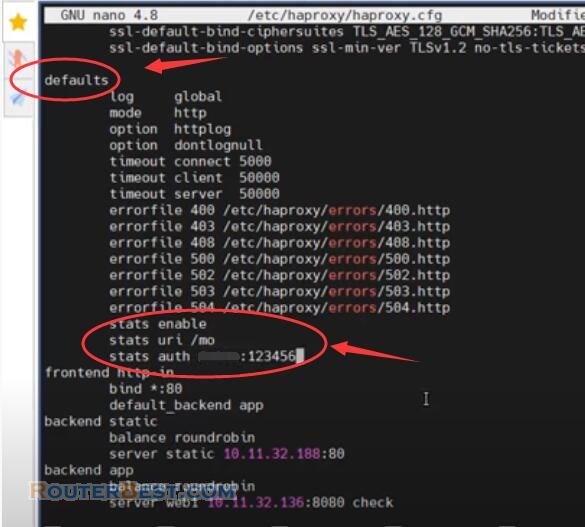
If you want to monitor the haproxy service using a graphical interface, you can add the following configuration lines. Here you can customize your username and password as you like. I'm setting up my username "routerbest" and password "123456". You will use the username and password to access the haproxy monitoring page.
        stats enable
        stats uri /mo
        stats auth routerbest:123456
sudo service haproxy restart
Next, you configure haproxy for the second server. Before configuring haproxy on the second server, you need to disable the haproxy service and disable the keepalived service on the first server.
sudo service keepalived stop
sudo service haproxy stop
Then the virtual ip address will be assigned to the second server. To make it quick, just copy the configuration from the first server to the second and save it. After configuring haproxy for the second server, don't forget to enable haproxy and keepalived services on the first server.
By this step you have done load balancing with two servers. Your Wordpress website will run on two servers.
Facebook: https://www.facebook.com/routerbest
Twitter: https://twitter.com/routerbestcom
Tags: Apache keepalived HAproxy website WordPress

