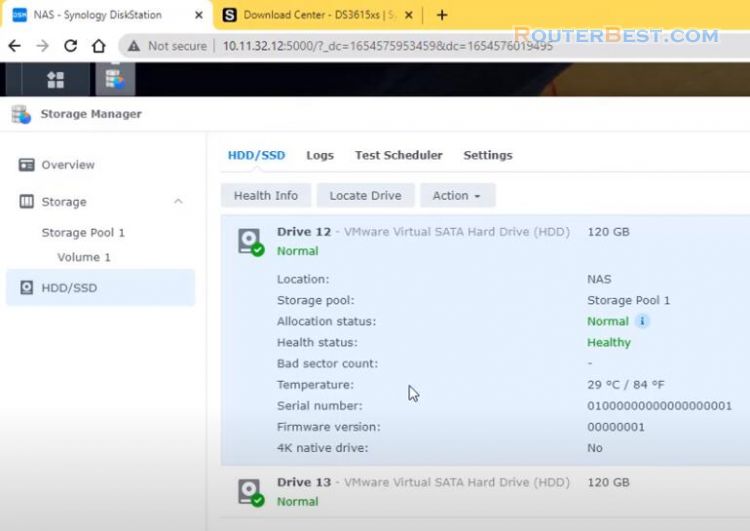
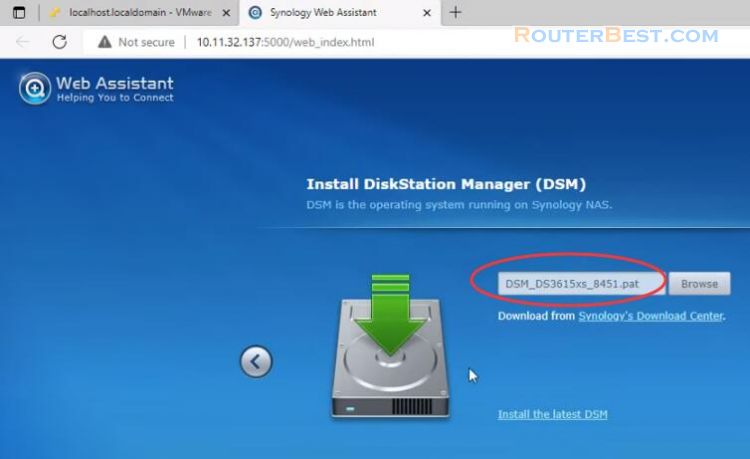
In this article, I will guide you to turn your computer into a Synology NAS with DSM 7.1 operating system.
First you need to prepare the following equipment:
A computer to build a Synology NAS
Another computer for configuration
A USB stick
To do this, you perform 6 basic steps as follows, let's get started.
Download tinycore-redpill
https://github.com/pocopico/tinycore-redpill
You will get a compressed file, you extract it with Winrar or 7zip. The final file is about 1GB in size and has the extension img. To write this file to a USB stick you use the software Win32DiskImager.
Burn IMG file to USB stick
You select your USB stick and navigate to the file you just downloaded in the previous step.
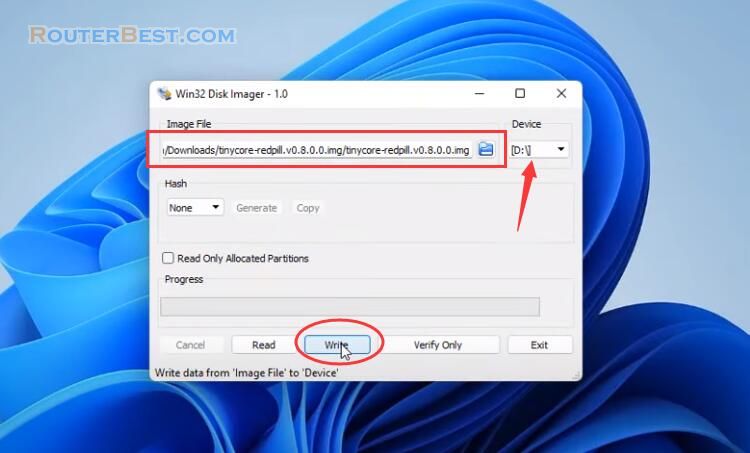
After a few minutes, you will have the USB stick you want.
Boot tinycore from USB stick
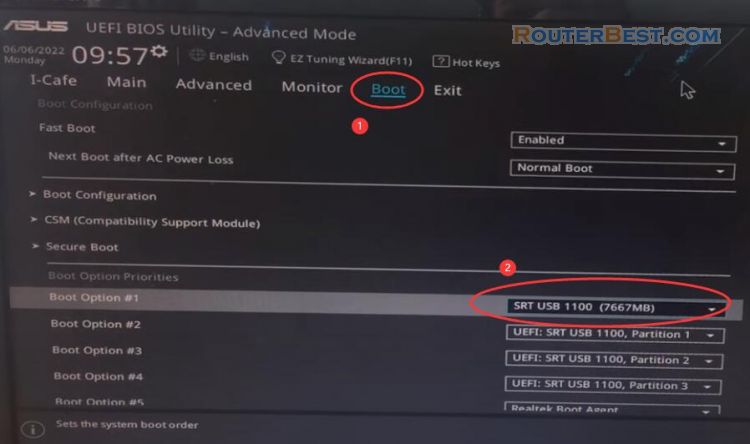
You plug the USB stick into the target computer. You customize the computer's boot order to a USB stick. Depending on the manufacturer, there will be different configuration methods. If your motherboard is ASUS then do as I am.
It will take you about 1 to 2 minutes to start up until the simple graphical interface appears as follow:
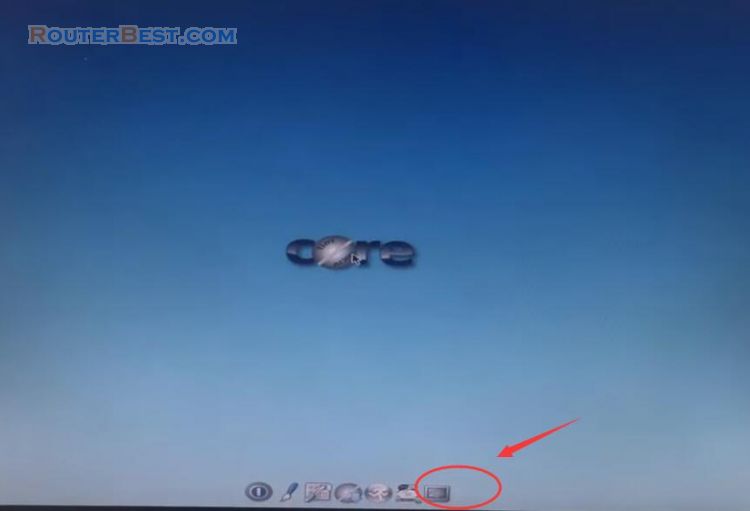
You look at the options below the screen and you open the command window. The important thing you need to get is the address of the target computer so you use the "ifconfig" command to get it.
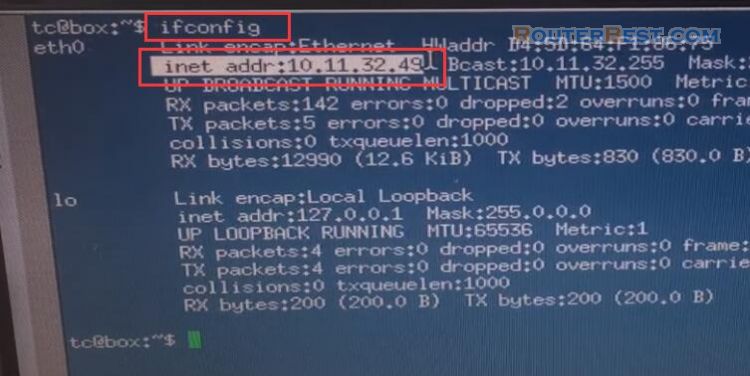
As in this example the ip address is 10.11.32.49. You use this address for remote access using ssh.
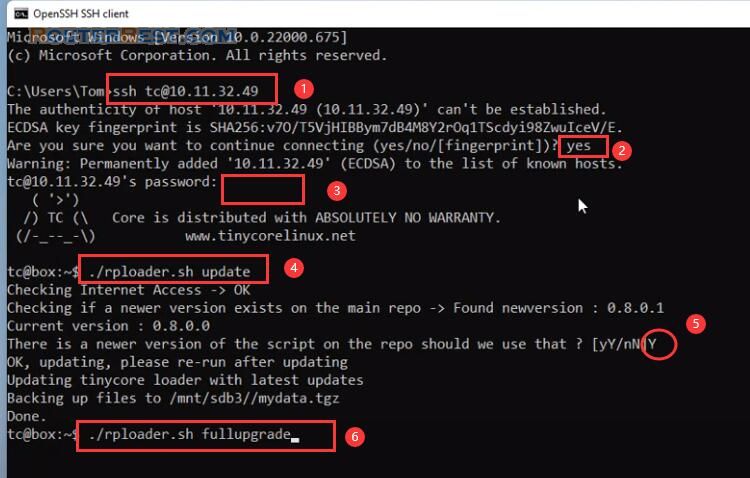
Default username is tc and password is P@ssw0rd. You use 6 commands to get the job done, I'll leave these as follows:
Login credentials: tc/P@ssw0rd
Update & Upgrade
./rploader.sh update
./rploader.sh fullupgrade
So all you have to do is copy and paste it into the command window and you're done. The first two commands help you update and upgrade.
Configure System-Specific Parameters
Each USB stick has different VID and PID parameters, so the third command will automatically find these information and configure it for you. As here VID is 0x090C and PID is 0x1000.
USB flash drive VID/PID : ./rploader.sh identifyusb
Serial number/MAC : ./rploader.sh serialgen DS920+ realmac
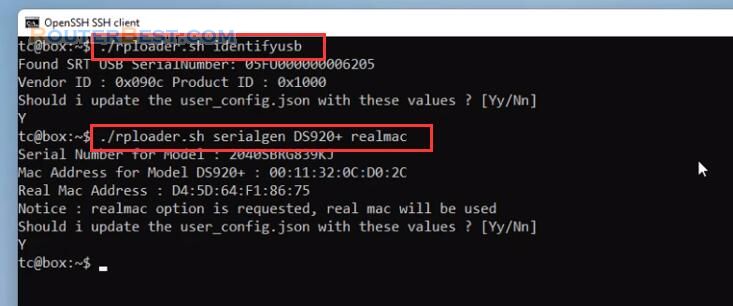
There are two options for configuring the MAC address: randomly generate or use the real MAC address. Using the real MAC address will help you to configure WoL for Synology NAS.
Build the Loader
The 5th command is to build the loader, I choose DS920+ to show in this video because it will help you avoid unexpected errors. Also you can build loaders for other models but a suitable motherboard is required. The last command is to reboot to use the newly created loader.
./rploader.sh build geminilake-7.1.0-42661
exitcheck.sh reboot
Download the DSM install PAT file
Next, use the Synology Assistant software to search for NAS devices in your network.
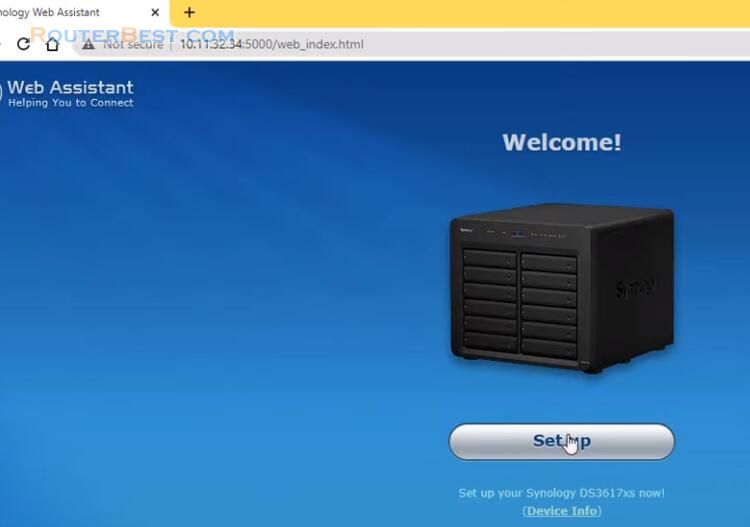
After a while of searching you found a new Synology device that was not installed. You click on it and a welcome page appears.
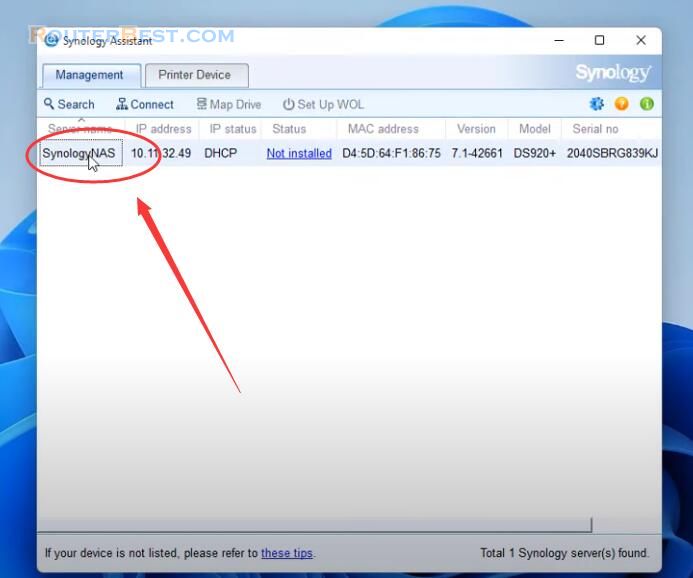
Next, go to Synology's homepage and download the operating system for your NAS device.
https://www.synology.com/en-global/support/download
You search for the operating system that corresponds to the DS920+. Next you choose DSM 7.1 42661 and download.
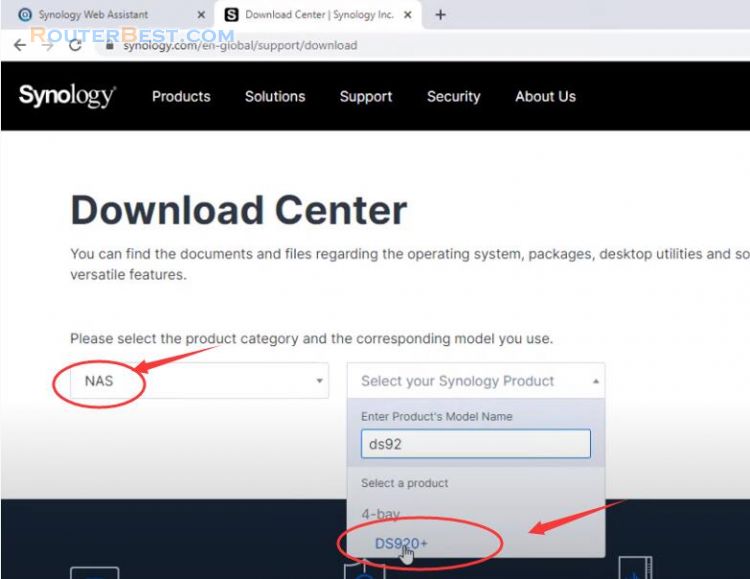
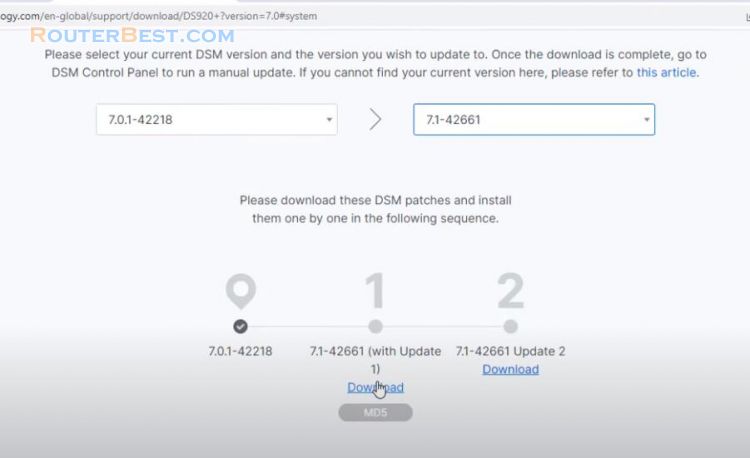
You will get a file with extension pat with size almost 400MB. You go back to the settings page to upload the downloaded operating system file.
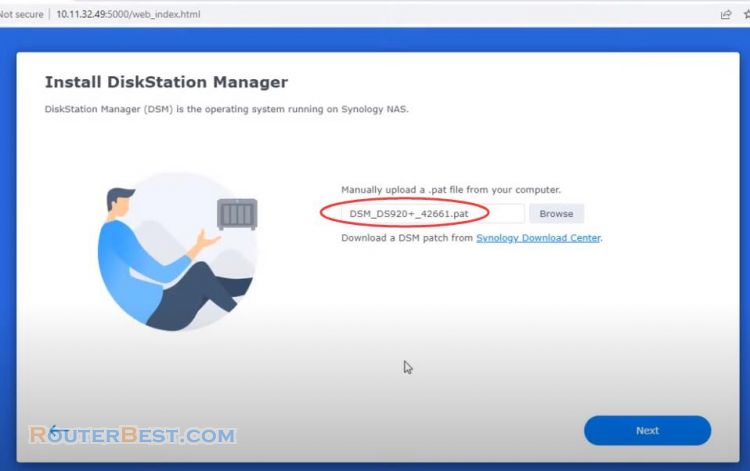
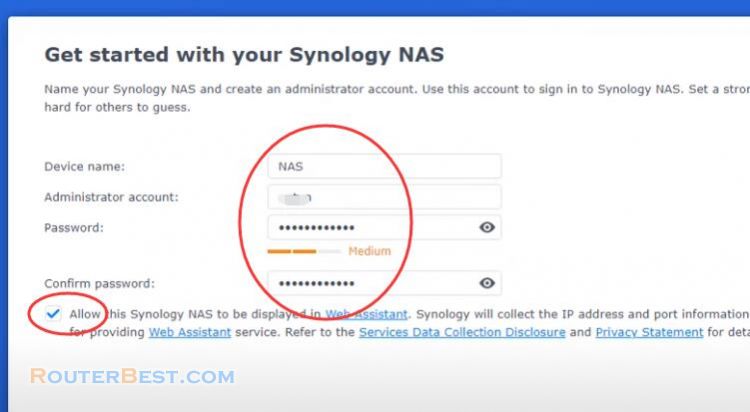
It will take about 5 to 10 minutes to install DSM 7.1 for your NAS device so please wait patiently. You will be asked to name and create an admin account for your Synology NAS.
An important note is that you set the update to manual mode because it will cause error after updating.
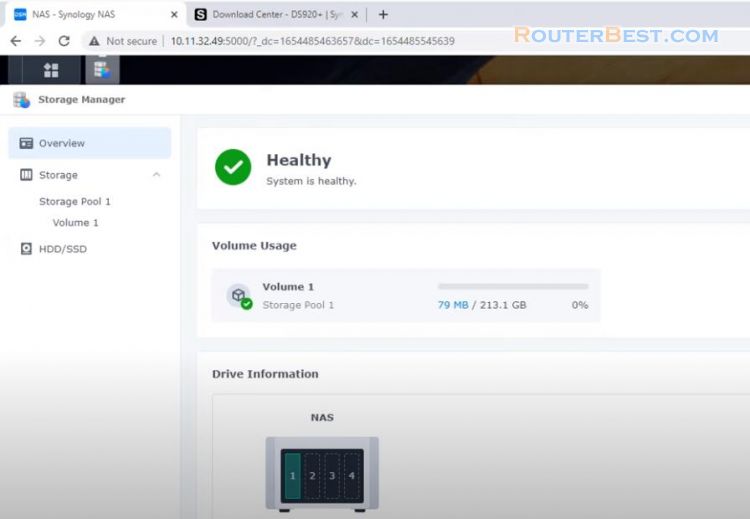
Finally got the job done and turned a PC into a Synology NAS with DSM 7.1. Now you can do everything with it like any other Synology NAS device.
Facebook: https://www.facebook.com/routerbest
Twitter: https://twitter.com/routerbestcom
Tags: Synology NAS DSM

