To install a TP-Link Archer router to work with a cable modem, follow these steps:
Power off your cable modem and remove the Ethernet cable from your computer or existing router.
Connect the Ethernet cable from the cable modem to the WAN port on the TP-Link Archer router.
Connect another Ethernet cable from any of the LAN ports on the TP-Link Archer router to the Ethernet port on your computer.
Power on your cable modem and wait for it to fully boot up, usually indicated by the status lights on the modem.
Power on your TP-Link Archer router and wait for it to fully boot up, usually indicated by the status lights on the router.
Open a web browser on your computer and type the default IP address of the router in the address bar, usually 192.168.0.1 or 192.168.1.1.
Enter your login credentials for the router. The default username and password are usually "admin" for both, but may vary depending on the router's firmware version.
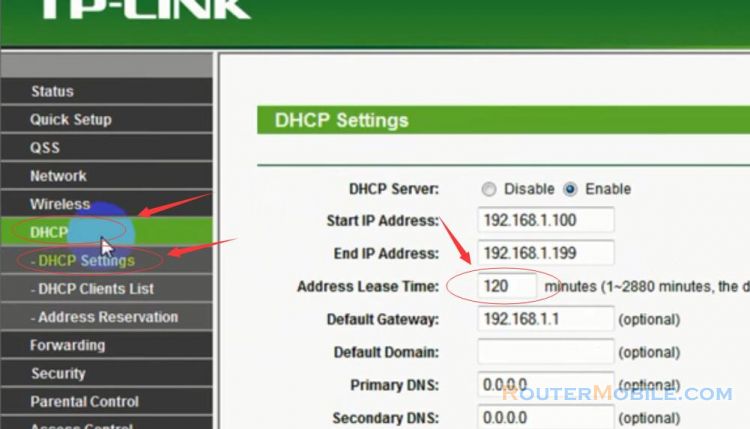
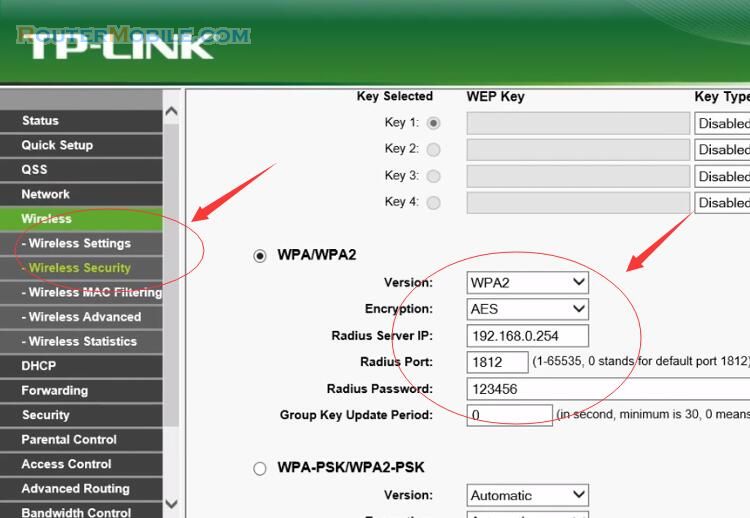
Once you're logged in, go to the "Network" or "Internet" settings in the router's web interface.
Select "Dynamic IP" or "Automatic Configuration (DHCP)" as the internet connection type, as this is usually the default setting for cable modems.
Save the settings and wait for the router to establish a connection with the cable modem.
Test your internet connection by opening a web browser on your computer and visiting a website.
If you encounter any issues during the installation process, consult the user manual for your TP-Link Archer router or contact TP-Link customer support for assistance.
Facebook: https://www.facebook.com/routerbest
Twitter: https://twitter.com/routerbestcom
Tags: TP-LINK