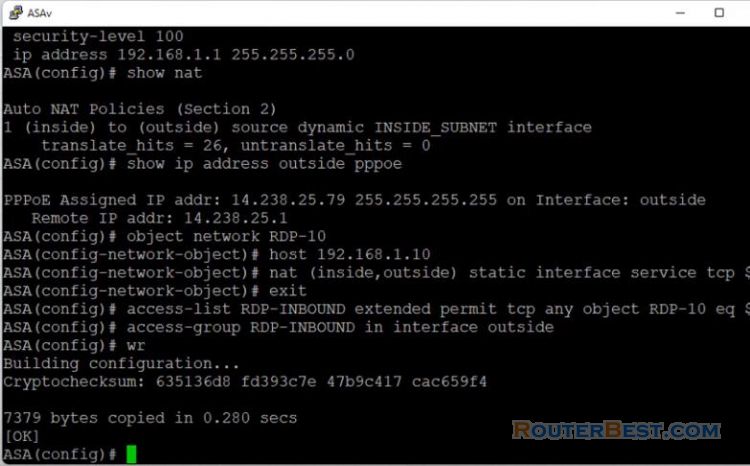
In this article, you will learn How to INTERNET configuration without command - Cisco ASA, so that computers can connect to the internet using the GUI.
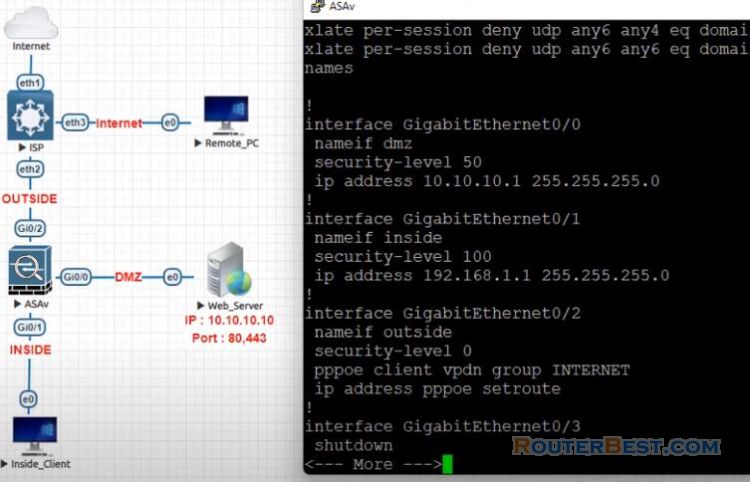
The Cisco ASA is installed as a pppoe client to connect to ISP. In most cases it is used between a private Network and the internet.
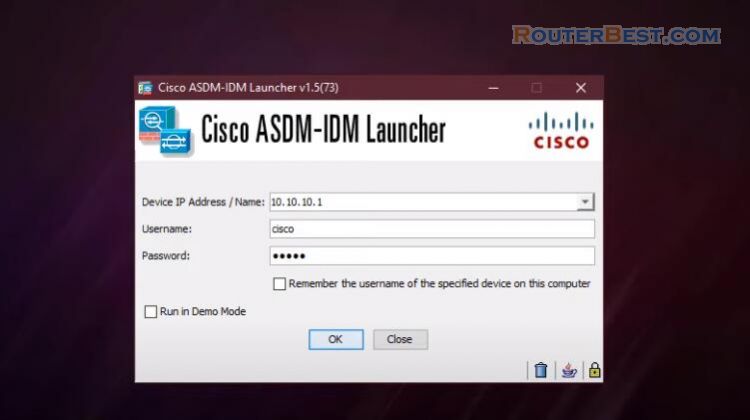
The article guides pppoe dialing configuration for outside ports on Cisco ASA devices.
Go to "Configuration" > "Device Setup" > "Interfaces", Create a "vpdn" group, here I've called it "INTERNET".
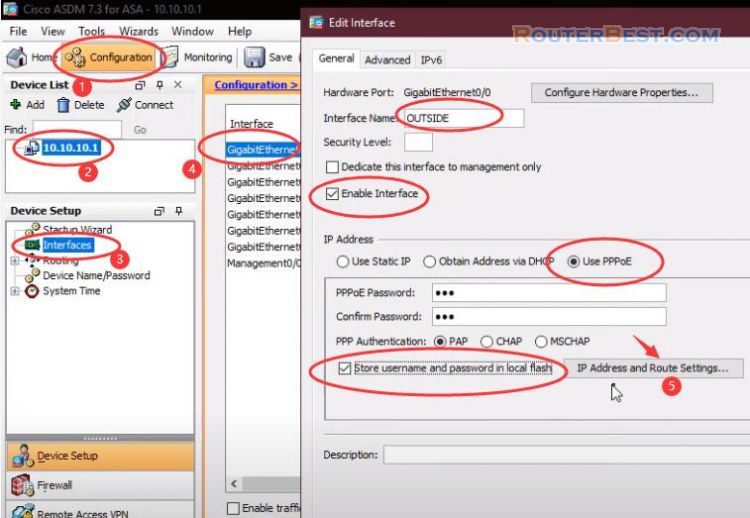
Configure the outside interface
Supply your username and password, set the authentication method, here I'am using "pap". Tick "store username and password in local flash".
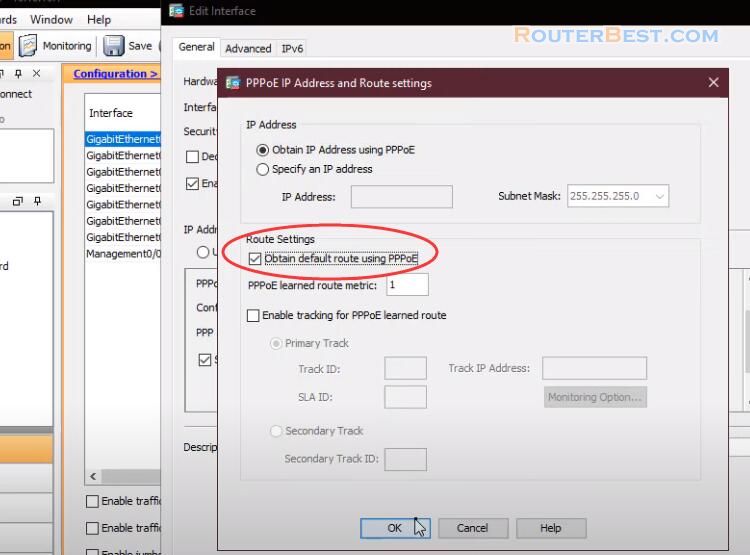
Tick "Obtain default route using PPPoE".
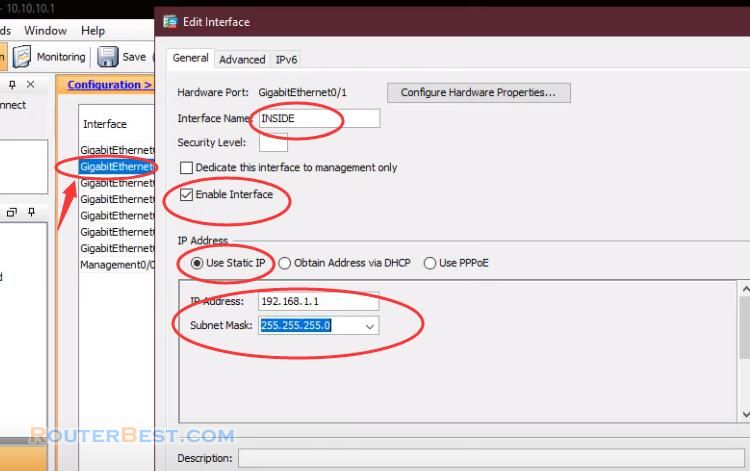
Configure the inside interface
In order for a Cisco ASA interface to work, three things must be configured, the name of the interface, the security level, and the IP address.
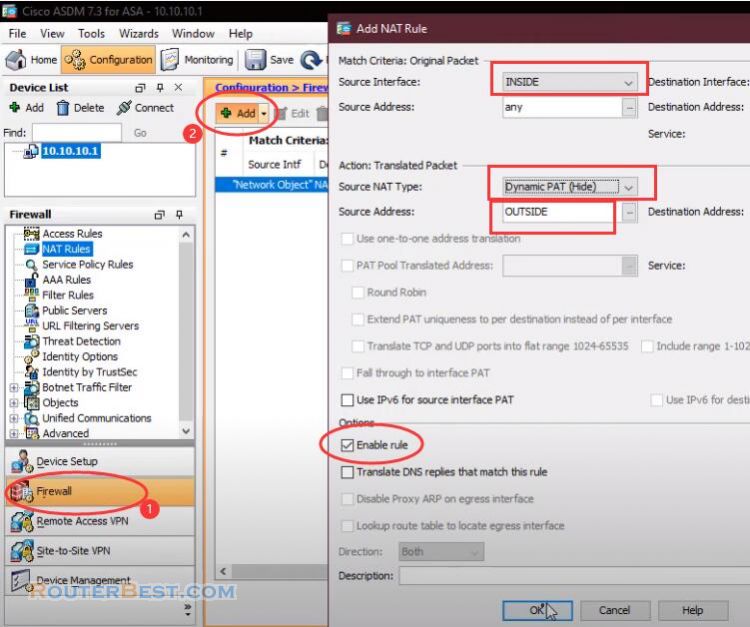
Next, configure NAT to allow computers from the internal network to the Internet.
Configure NAT
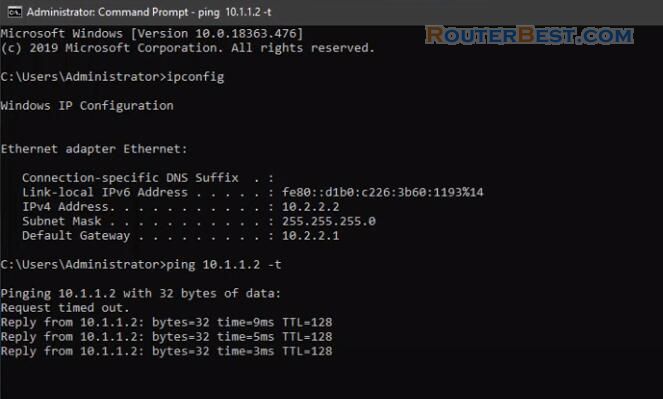
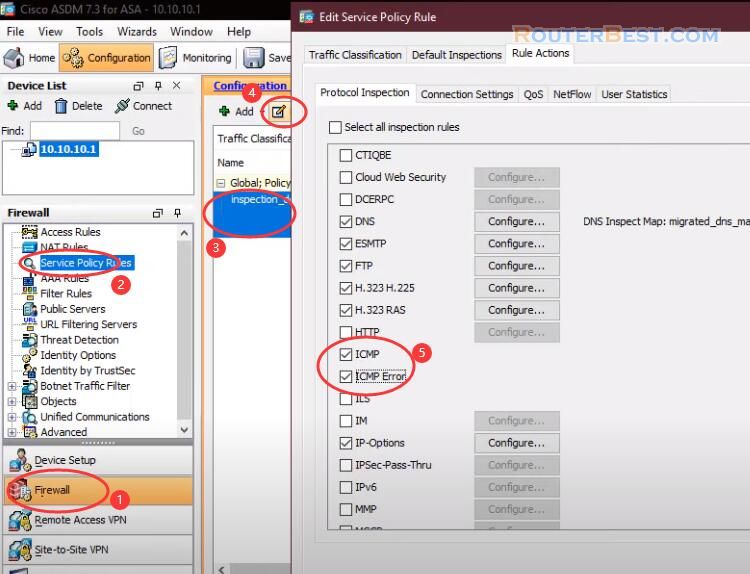
By default computers in the local network cannot ping outside the internet. To enable ping, follow these steps:
Go to "Configuration" > "Firewall" > "NAT Rules".
Go to "Configuration" > "Firewall" > "Service Policy Rules".
Configure DHCP Service for Inside Interface
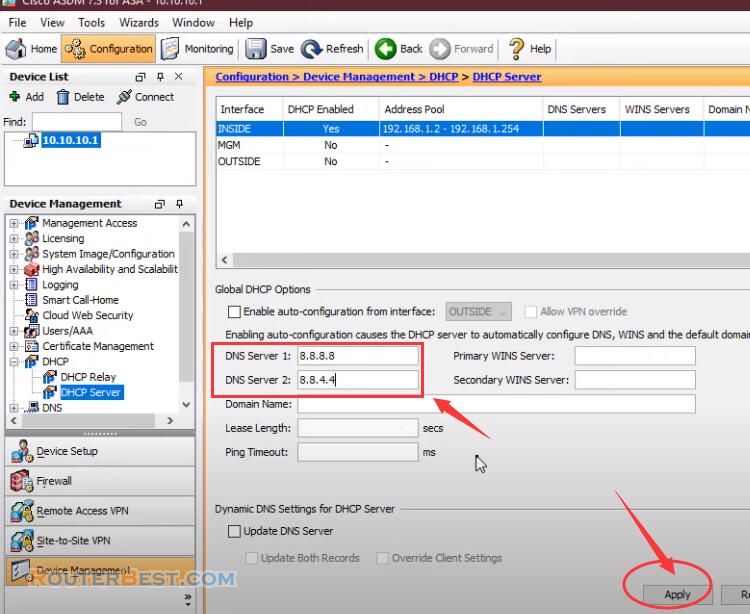
Go to "Configuration" > "Device Management" > "DHCP" > "DHCP Server". Create a DHCP address pool.
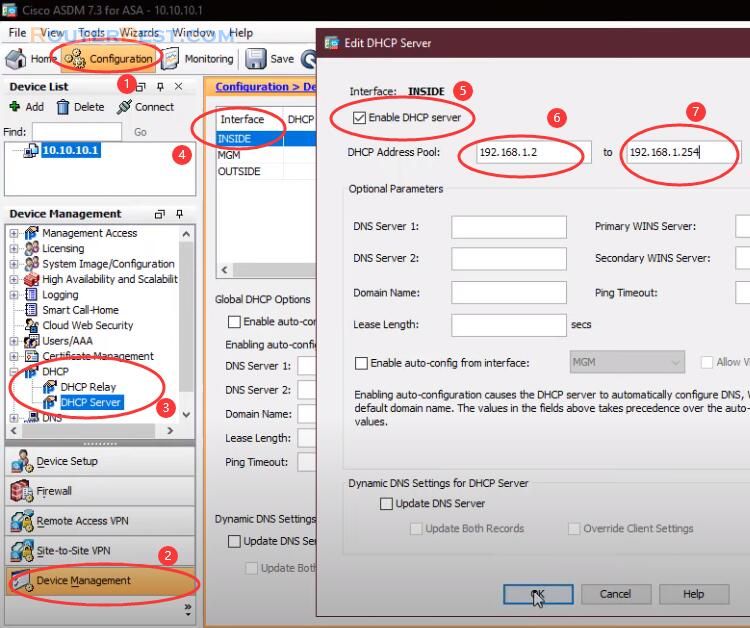
Do specify the IP addresses of the DNS servers the client will use.
You can now browse the internet using any computer that connects to the internal interface.
Facebook: https://www.facebook.com/routerbest
Twitter: https://twitter.com/routerbestcom
Tags: Cisco Asa

