This article explains the configuration of site to site VPN where both sites have a static public IP on the WAN interface.
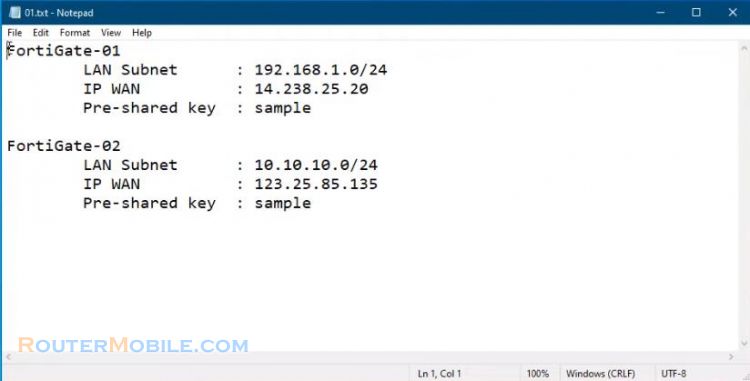
The following are the IP address information of both FortiGates.
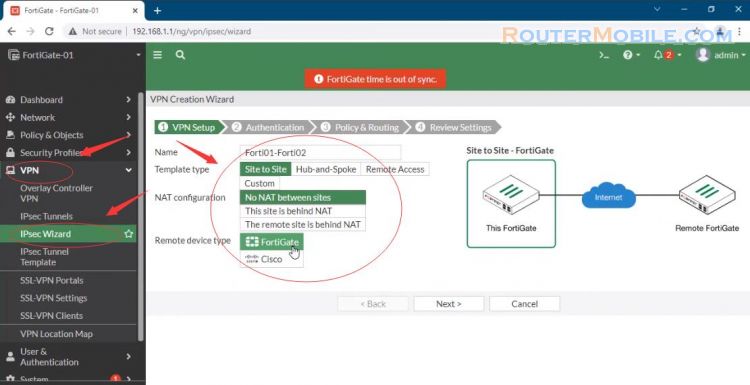
Select VPN -> IPSec Wizard
Input the tunnel name.
Select the Template Type as Site to Site, the "Remote Device Type" as FortiGate, and select NAT Configuration as No NAT between sites.
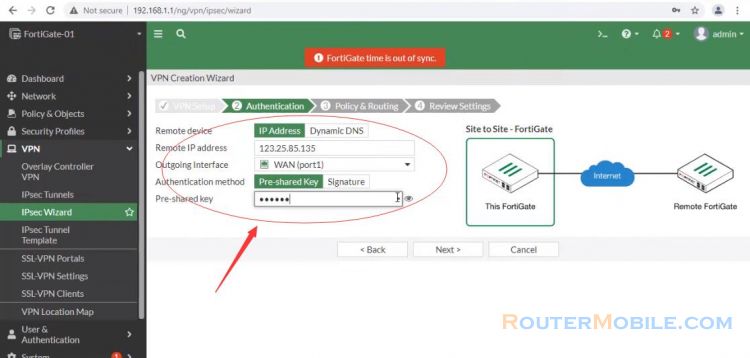
In the Authentication step.
Set IP Address to the WAN IP address of the remote FortiGate.
Set outgoing interface from the drop-down menu.
Set a secure pre-shared key.
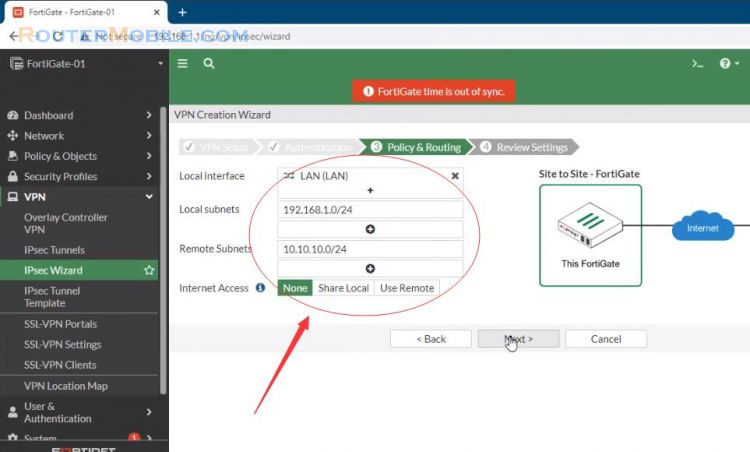
In the Policy & Routing step
Set local interface to LAN.
The wizard as the local subnet automatically.
Set Remote Subnets to the remote network's subnet, in the example 10.10.10.0/24.
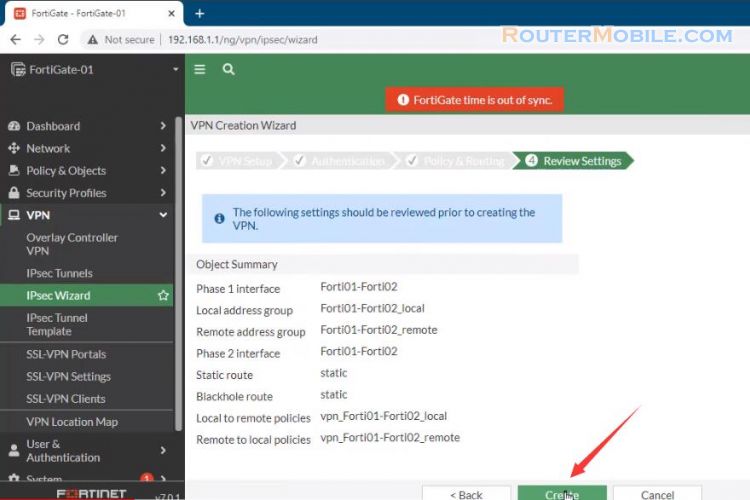
A summary page shows the configuration created by the wizard including interfaces.
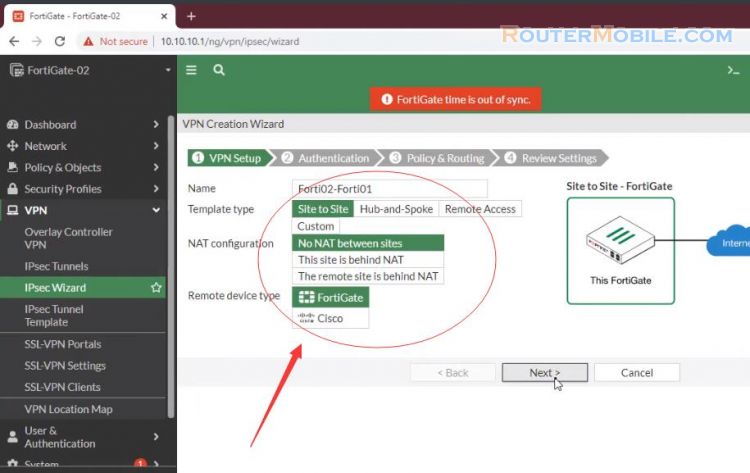
We can figure the same with the remaining fortigate. Go to VPN ipsec Wizard and create a new tunnel.
In the VPN Setup step, set Template Type to Site to Site, set Remote Device Type to FortiGate, and set NAT Configuration to No NAT between sites.
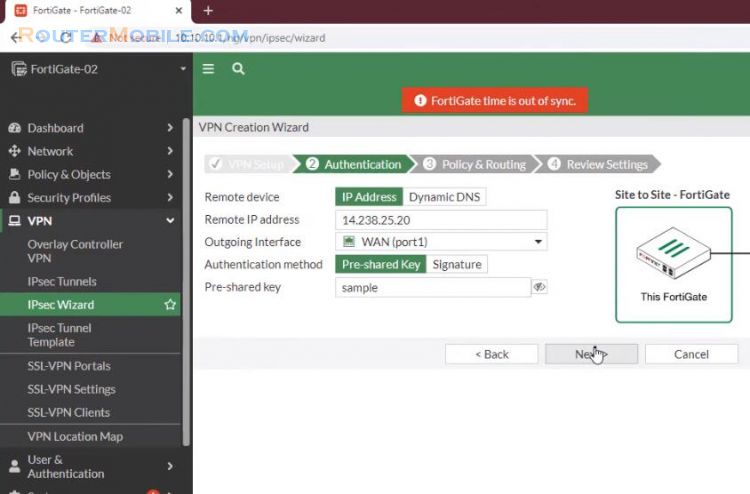
In the Authentication step, set IP Address to the WAN IP address of the remote FortiGate, in the example, 14.238.25.20.
Set the same secure Pre-shared Key that was used for the VPN on remote FortiGate 1.
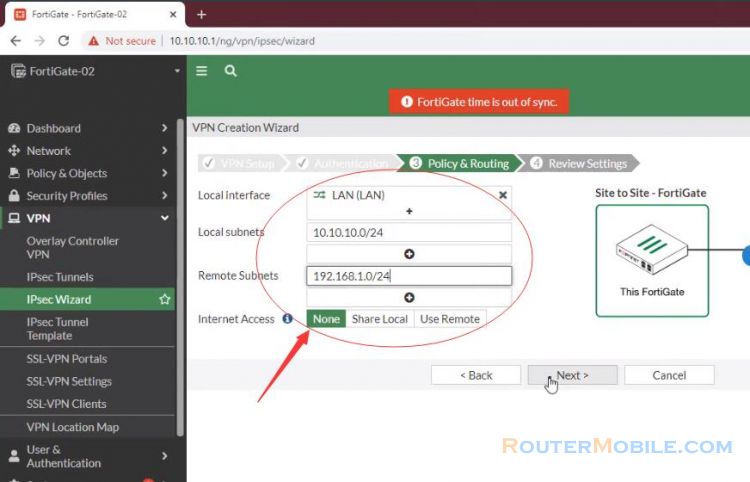
In the Policy & Routing step, set Local Interface to LAN. The wizard as the local subnet automatically.
Set Remote Subnets to the remote network's subnet, in the example, 192.168.1.0/24.
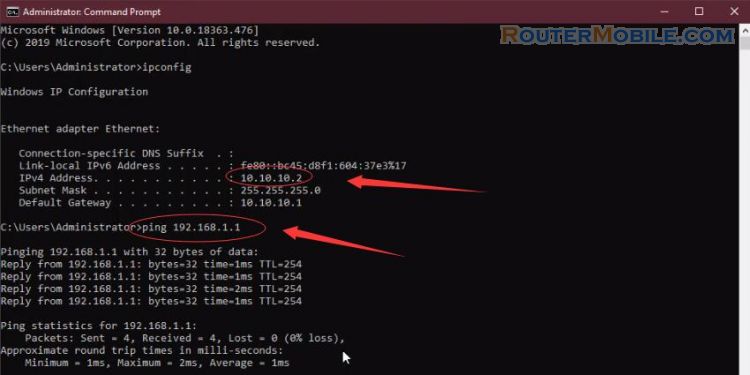
A user on either of the office networks should be able to connect to any address on the other office Network transparently.
Facebook: https://www.facebook.com/routerbest
Twitter: https://twitter.com/routerbestcom

