This article describes how to configure vpn site to site between two Cisco ASA.
Add Network Object
On site A, complete these steps in order to set up the site-to-site VPN tunnel via the ASDM wizard.
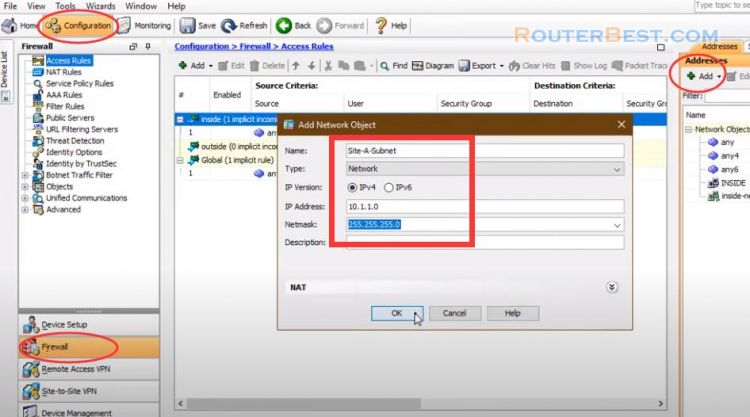
Go to "Configuration" > "Firewall" > "Access Rules", "Add" > "Add Network Object".
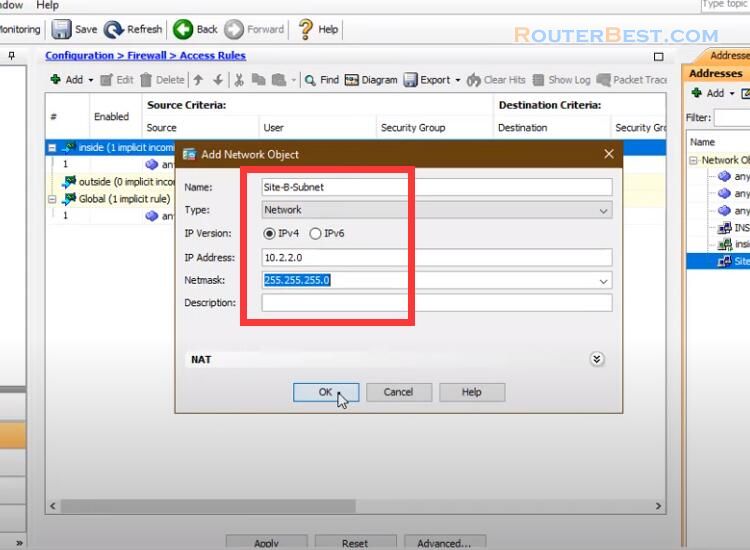
Then, add another network object named "Site-B-Subnet".
Site-to-site VPN Wizard
Open the ASDM and navigate to Wizards > VPN Wizards > Site-to-site VPN Wizard. Click "Next" once you reach the wizard home page.
Configure the peer IP address, In this example, the peer IP address is set to 123.25.78.96 on Site B. The interface through which the remote end can be reached is also specified.
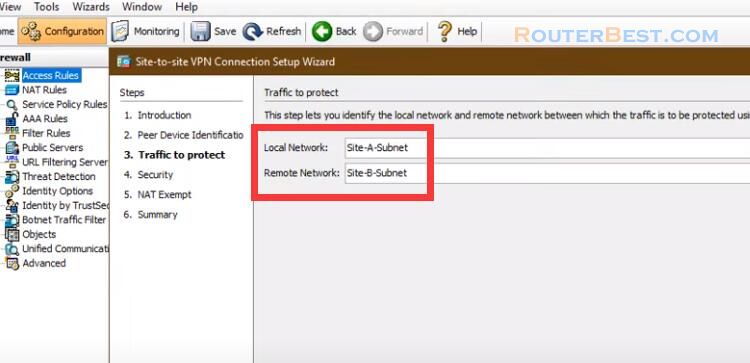
Configure the local and remote networks.
On the security page configure the pre-shared key. It must match on both of the ends.
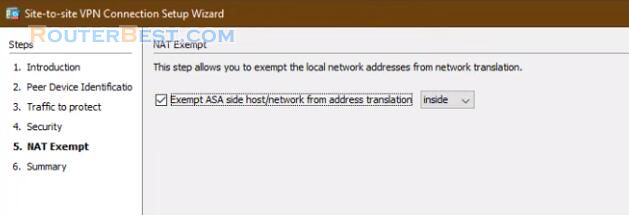
Configure the source interface for the traffic on the ASA.
The wizard now provides a summary of the configuration that will be pushed to the ASA. Review and verify the configuration settings, and then click Finish.
Cisco ASA device on side B
You can figure the same for the Cisco ASA device on side B.
Open the ASDM and navigate to Wizards > VPN Wizards > Site-to-site VPN Wizard.
Configure the peer IP address, In this example, the peer IP address is set to 14.238.25.79 on Site A.
Configure the local and remote Networks.
On the security page configure the pre-shared key it must match on both of the ends.
The wizard now provides a summary of the configuration that will be pushed to the ASA.
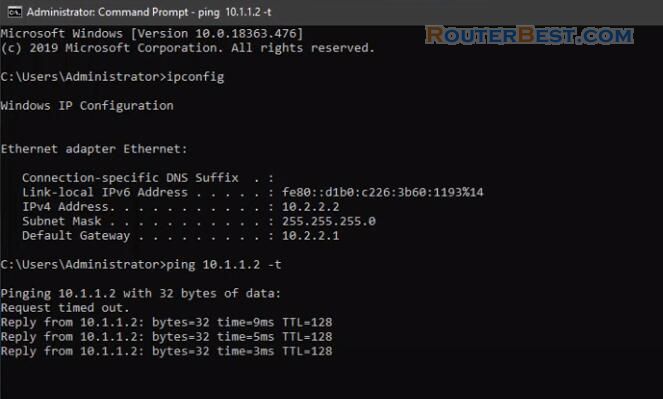
Save the running configuration to flash. Now let's check the results. Using a computer from site B, ping a computer at site A.
Facebook: https://www.facebook.com/routerbest
Twitter: https://twitter.com/routerbestcom

