This article explains How to Install DD-WRT Firmware on TP-LINK TL-WR740N/ND V4 Wireless Router. Its management IP is 192.168.0.1.
Step 1 : Log in TP-LINK TL-WR740N/ND V4 Wireless Router
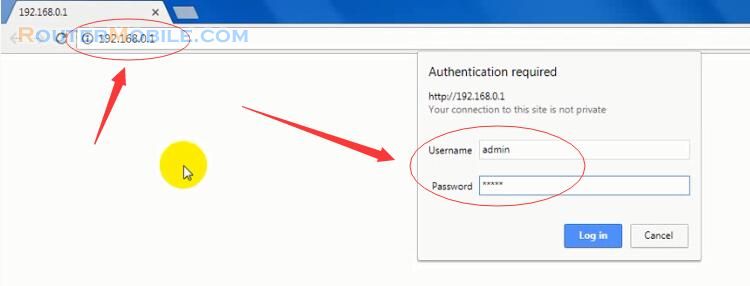
Open a web-browser (such as Microsoft Internet Explorer, Google Chrome, Mozilla Firefox or Apple Safari). Enter the ip address of TP-LINK TL-WR740N/ND V4 Wireless Router : 192.168.0.1.
Username : admin
Password : admin
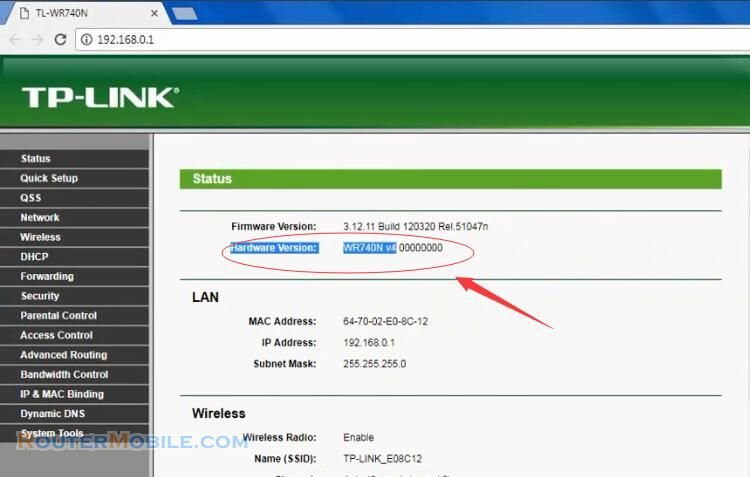
After logging in, you will see the hardware version of the TL-WR740N router.
Step 2 : Download Firmware
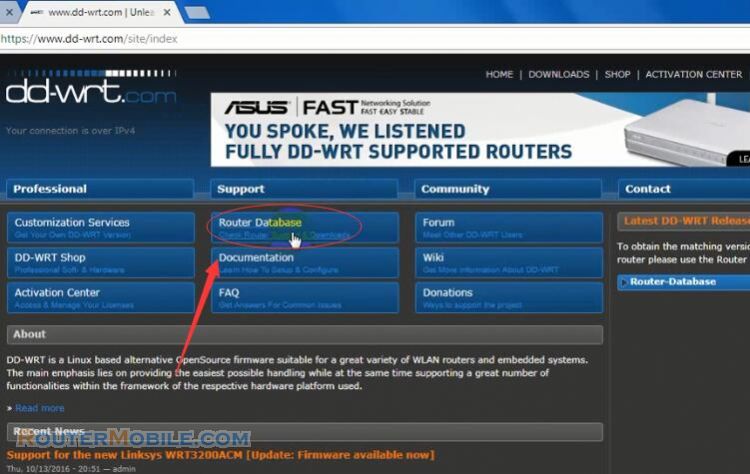
Go to "https://www.dd-wrt.com", click "Router Database".
Search "WR740N", it will give you a list of router model.
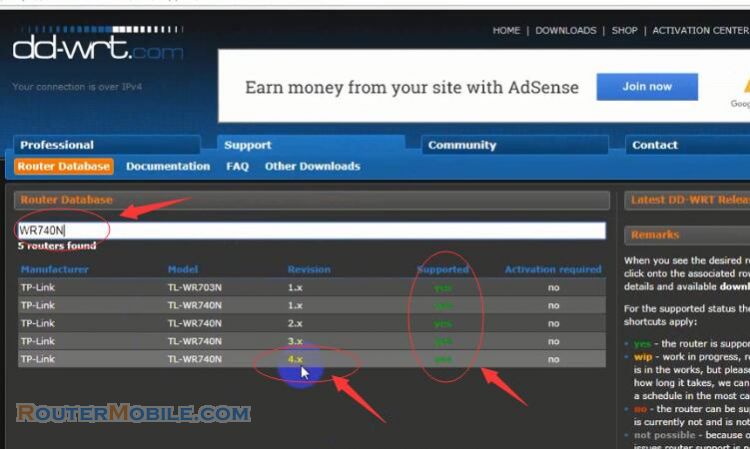
Click "4.x" revision, you will open a download page. Then, click "factory-to-ddwrt.bin" to download.
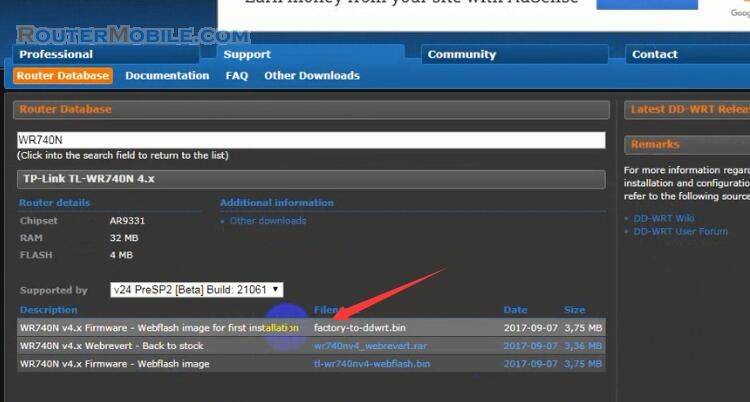
After downloading, copy the file "factory-to-ddwrt.bin" to your computer desktop.
Step 3 : Fireware Upgrade
Go to "System Tools" > "Firmware Upgrade".
Click "Choose File" button to select your "factory-to-ddwrt.bin" in the desktop. Then, click "Upgrade".
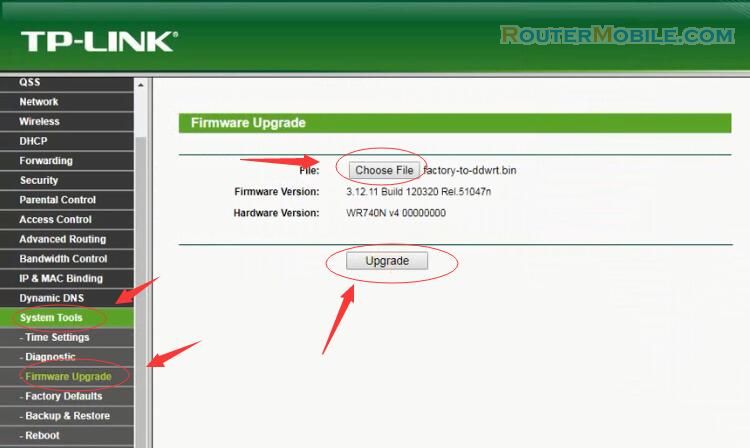
The upgrade will take a few seconds.
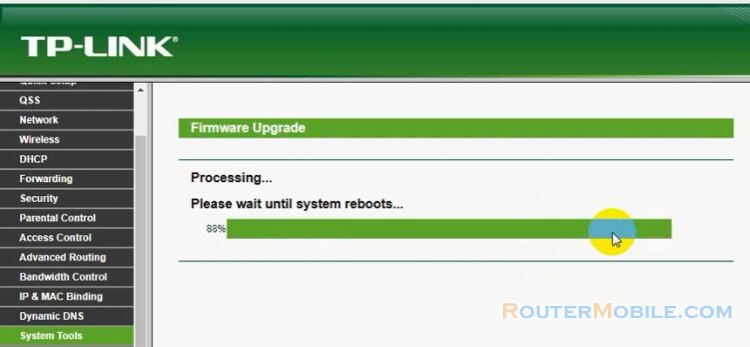
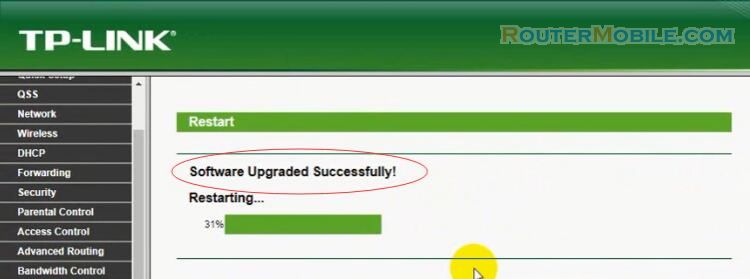
After the upgrade, it will prompt "Software Upgraded Successfully!", then it will restart.
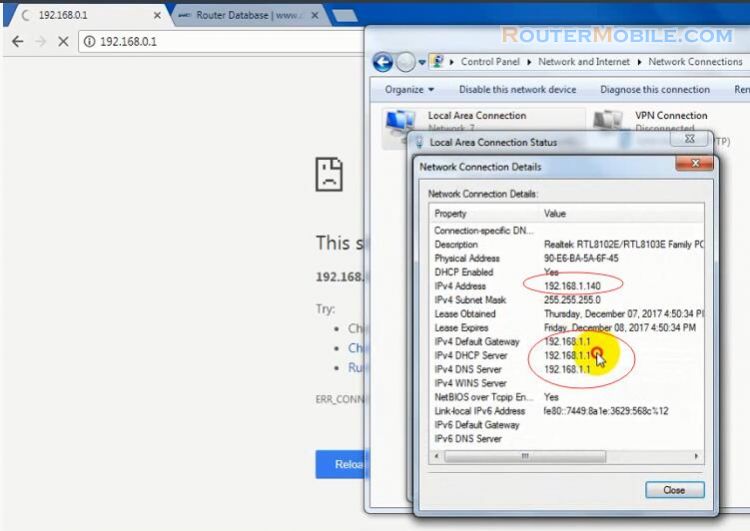
Finally, your computer automatically reconnects to the router and router's IP address changes to "192.168.1.1".
Step 4 : Setup DD-WRT
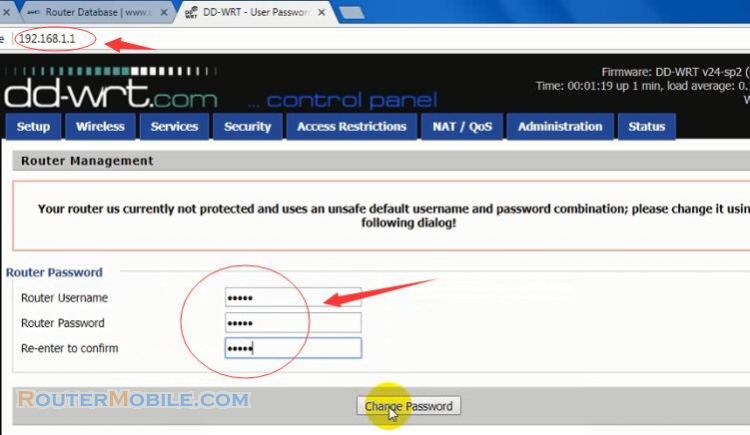
Visit "http://192.168.1.1", you will see that the interface of the router has changed. The first time you visit, it will prompt you to change the default user name and password because it is not safe to use the default user name and password (both are "admin").
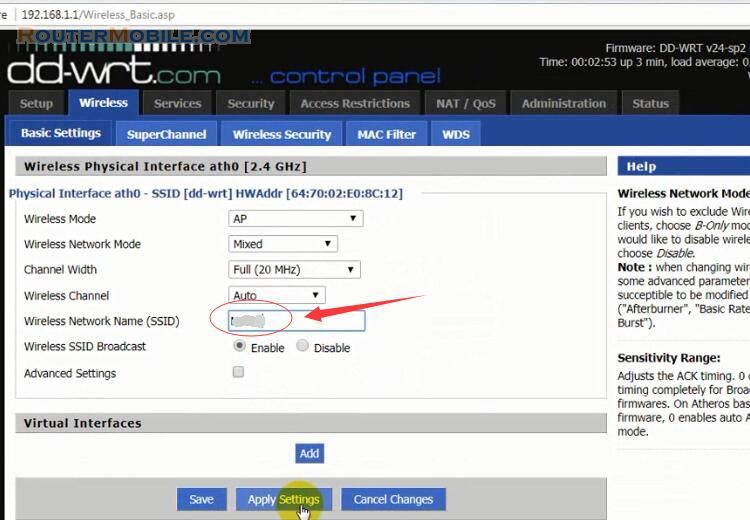
SSID Setting
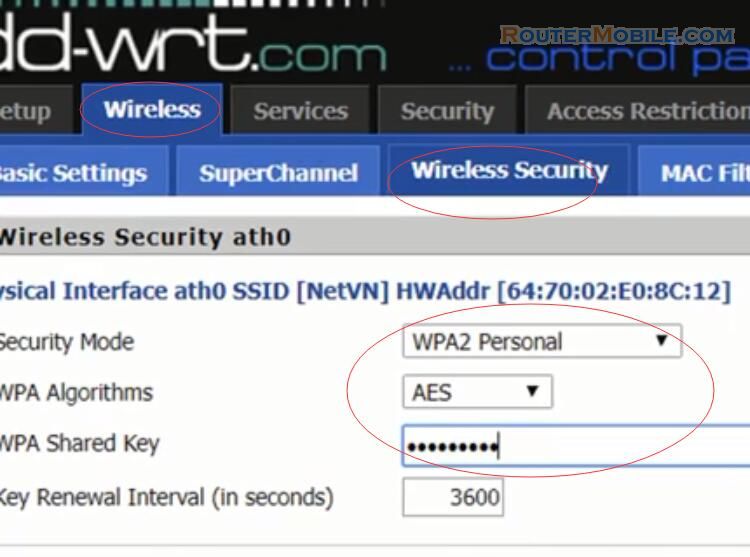
Wi-Fi Password Setting.
Facebook: https://www.facebook.com/routerbest
Twitter: https://twitter.com/routerbestcom


