It's a mistake if your EVE-NG doesn't have a Windows virtual machine. In this article, I will show you how to install Windows 10 in an EVE virtual environment.
Windows 10 iso file
First you need to prepare a Windows 10 iso file.
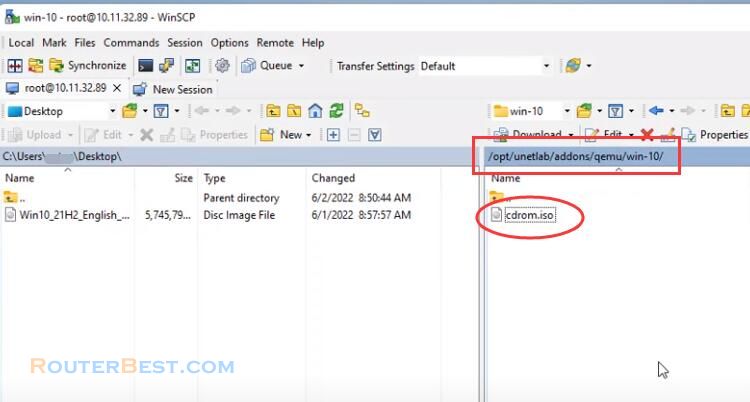
Next you copy and paste the iso file into eve using WinSCP.
File directory: opt/unetlab/addons/qemu
You create a new folder according to eve's naming convention, here I name it "win-10". Note that you must not name the wrong convention. Next, drag and drop the iso file into the newly created folder. You rename the iso file to "cdrom.iso".
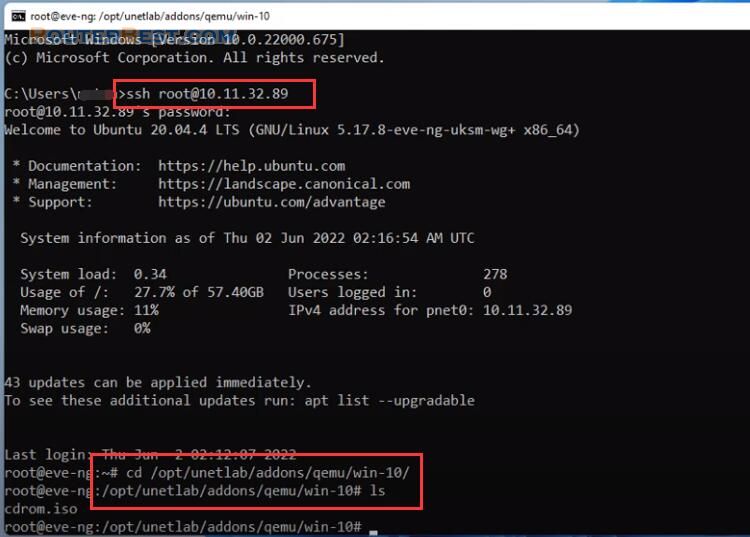
Next you open a command window access EVE with SSH.
cd /opt/unetlab/addons/qemu/win-10/
/opt/unetlab/addons/qemu/win-10# ls
You create a new hard drive for the Windows 10 virtual machine.
https://www.eve-ng.net/index.php/documentation/howtos/howto-create-own-windows-host-on-the-eve/
You can completely perform the previous steps using the command line according to the instructions.
Here you are instructed to create a hard drive of size 30G, because I installed Windows 10 so I increased the size to 40G.
/opt/unetlab/addons/qemu/win-10# qemu-img create -f qcow2 virtioa.qcow2 40G
Next, you create a new lab and name it as you like. I created a new lab named "win10". In the device list, I go to the Windows category and add a new computer.
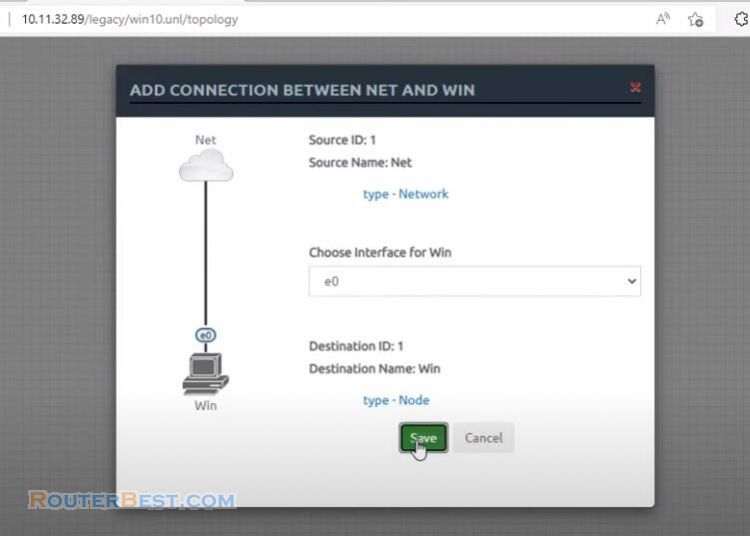
Next, you connect the virtual computer to the internet to update, install software or check the network connection.
Installing the Windows 10 operating system
You start the computer and start installing the Windows 10 operating system. You won't find the hard drive like when you install Windows 10 on a real machine.
To find the hard drive, click "Load Driver" > "Browse" > "Floppy disk drive" > "storage" > "2003R2" > "AMD64".
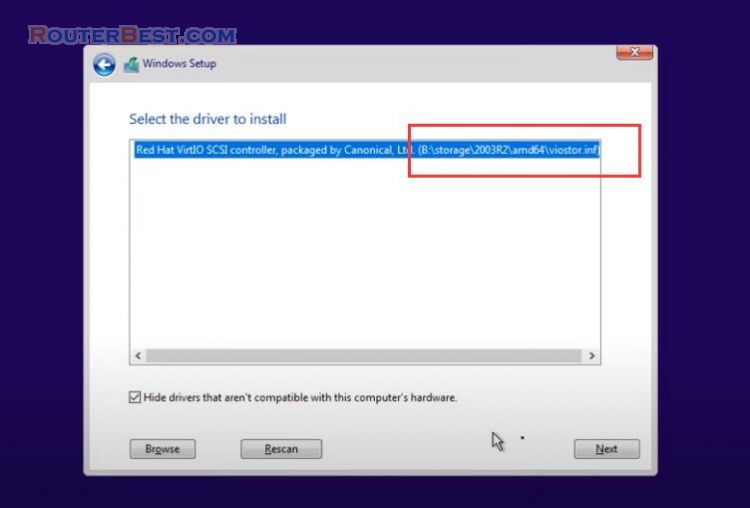
Wait a while you will see the hard drive appear and you install Windows 10 on it. The next installation steps will be the same as on a physical computer so I will fast forward the steps so you don't have to wait too long.
At this point, you have installed Windows 10 for the virtual machine, but you still have an important step to take.
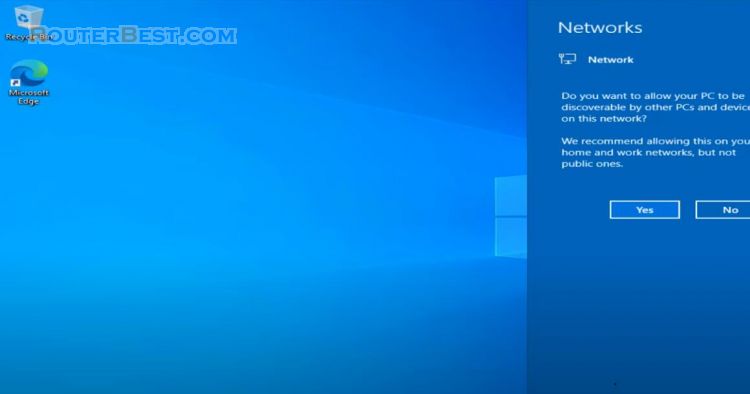
Please follow the next steps.
So the virtual machine works fine, has an internet connection, next you turn off the virtual machine and move on to the next step.
You go to Lab details and write down the UUID information.
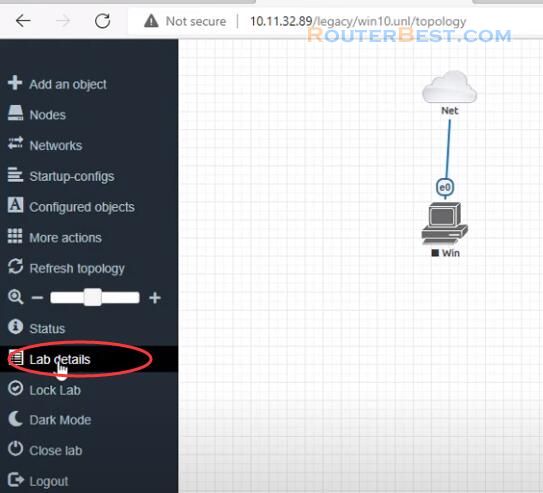
Next, Find out the POD ID of your used and the Node ID of your newly installed node.
As in this article, POD ID is 0.

Here is a sample command with the information you need to find.
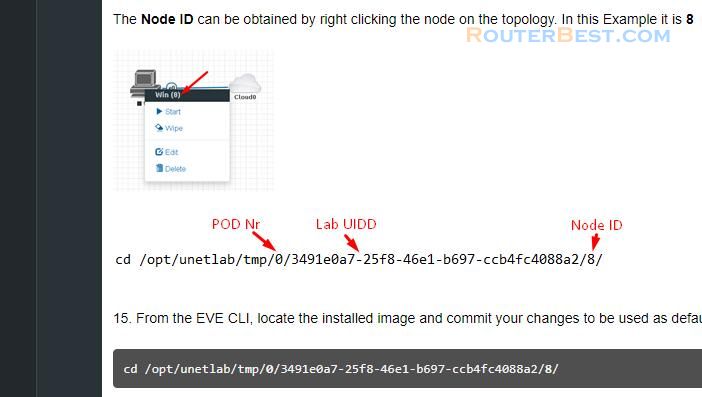
You right click on the newly created virtual machine to find the node id, and as you can see the node id is 1.
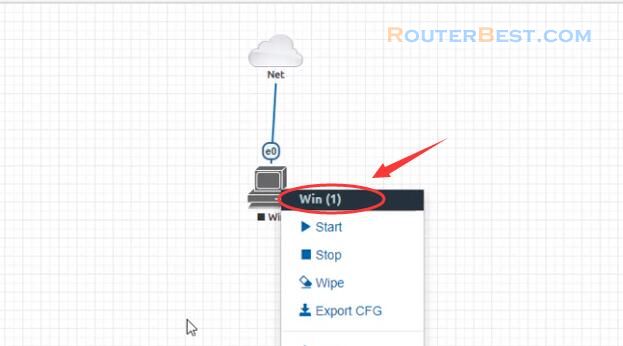
Next you create the image from the Windows virtual machine created in the previous step.
You notice the change in the size of the file virtioa.qcow2, which will increase in size after completion.
And here is the image file you obtained.
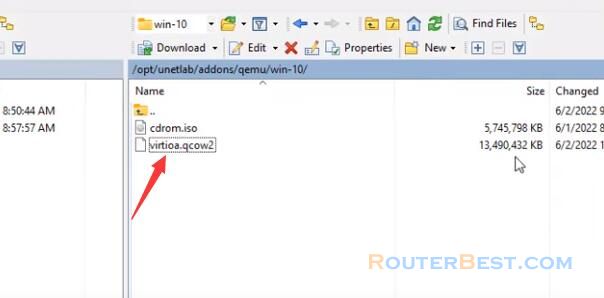
It will take you about 5 minutes to complete this step, so please wait patiently.
Now you can remove Windows 10 ISO file from Eve.
Facebook: https://www.facebook.com/routerbest
Twitter: https://twitter.com/routerbestcom
Tags: EVE-NG Windows 10

