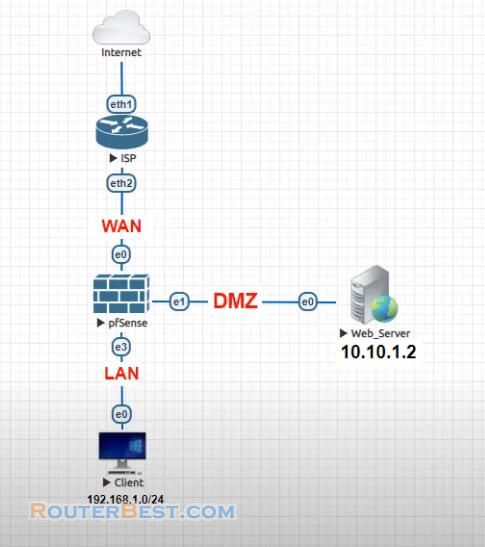
In this article, I explain how to basic protect your network with pfSense (WAN - DMZ - LAN). We have an example with a network with a web server.
Go to "Interface" > "Assignments". You should see that besides WAN and LAN port you now have one more available port, click on Add.
And now click on created OPT1 interface.
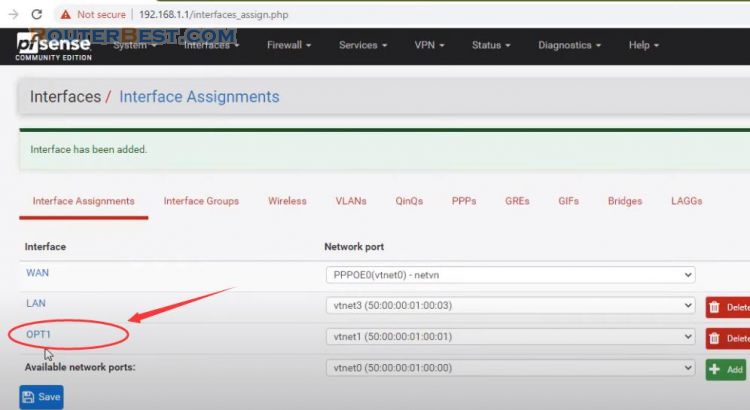
We will enable interface, change the name from OPT1 to DMZ, under IPv4 Configuration Type select Static IPv4.
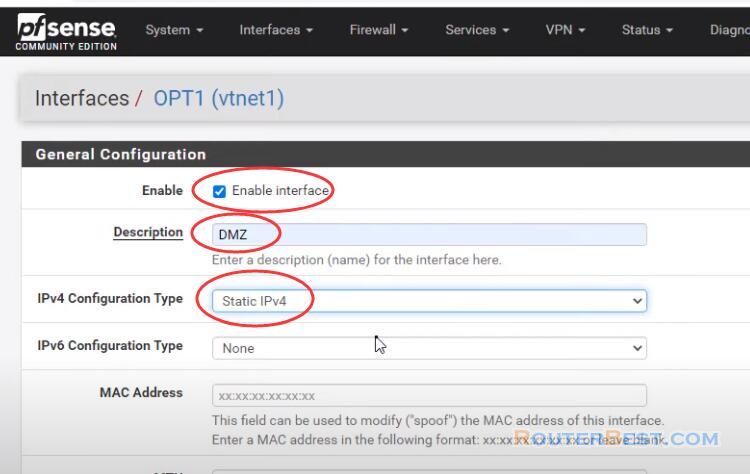
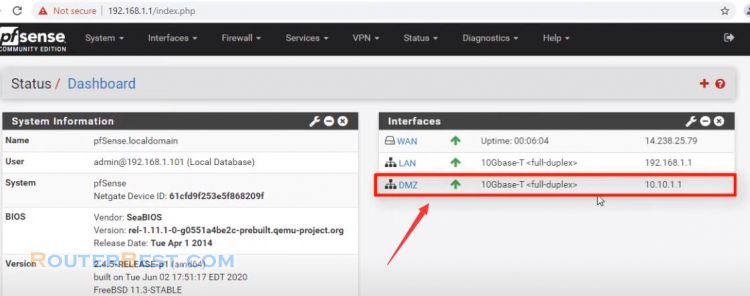
Uder static IPv4 Configuration I will add IP 10.10.1.1 with 24 bit subnet mask.
Your network is divided into 3 roles which are WAN, LAN and DMZ.
Go to "Firewall" > "NAT" > "Port Forward".
In this recipe, you will protect a Web server by connecting it to your pfSense DMZ network. In addition to protecting the Web server, the DMZ also protects the rest of the network.
Next, we have to let web traffic from the internet pass to our web server inside of DMZ.
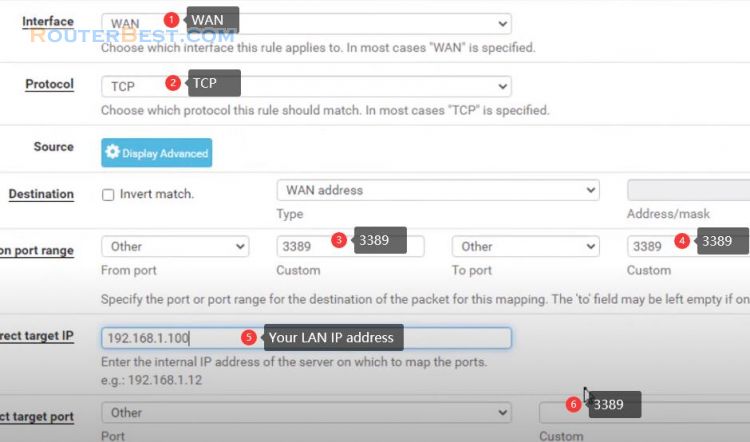
Interface: WAN
Address Family: IPv4
Protocol: TCP
Destination: WAN address
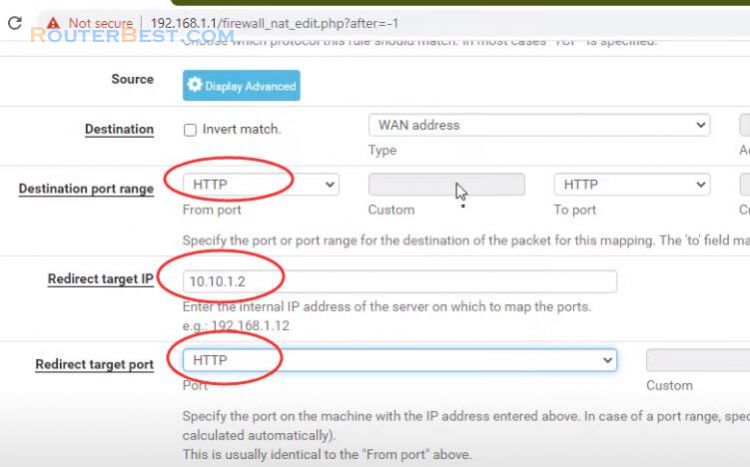
Destination port range: HTTP
Redirect target IP: ip address of web server.
Redirect target port: HTTP
Then, add a https protection.
Interface: WAN
Address Family: IPv4
Protocol: TCP
Destination: WAN address
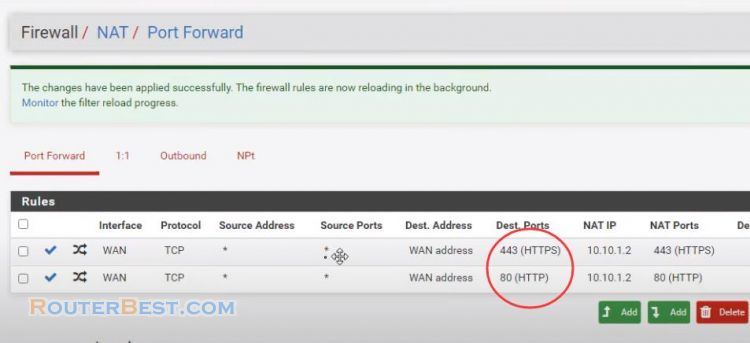
Destination port range: HTTPS
Redirect Target IP IP address of web server
Redirect Target port: HTTPS
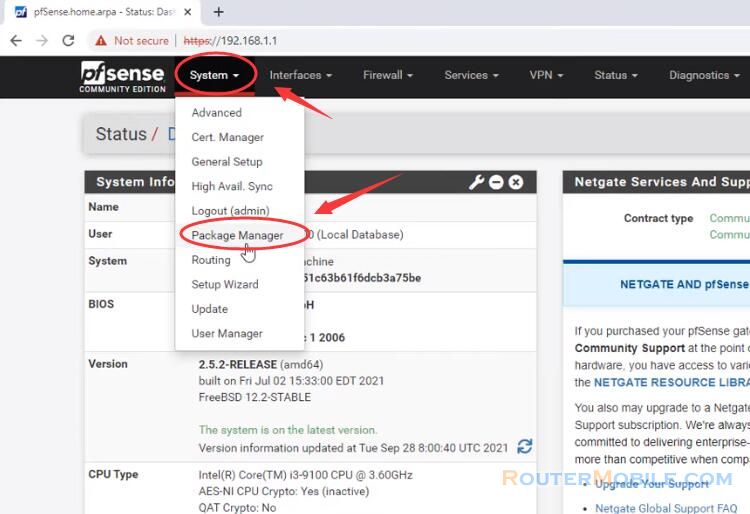
Next Go to "System" > "Advanced" > "Admin Access", change the TCP port to 444. and check the "WebGUI redirect" option to prevent pfSense from redirecting your web server to itself.
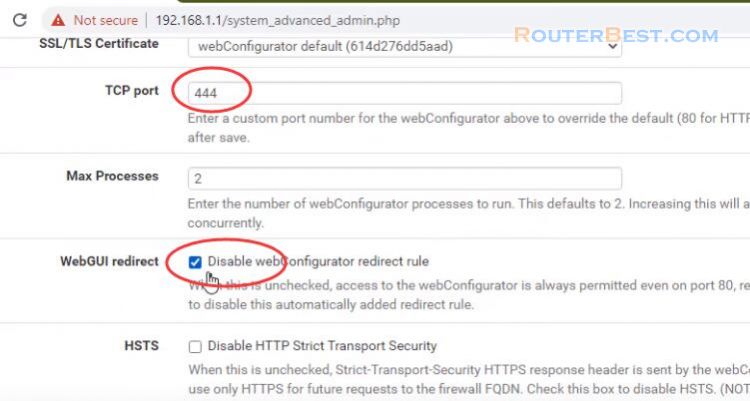
While still in "Advanced", navigate to the "Firewall/NAT" tab and scroll down to "Network Address Translation". Change the "NAT Reflection mode for port forwards" to "Enable NAT + Proxy".
Now you should be able to access your web server from the internet.
Facebook: https://www.facebook.com/routerbest
Twitter: https://twitter.com/routerbestcom
Tags: pfSense

