Do you want to power on your computer remotely and then control it by phone? It sounds like a Hollywood movie but it's totally doable with some preparation.
Enable WOL on Windows 10
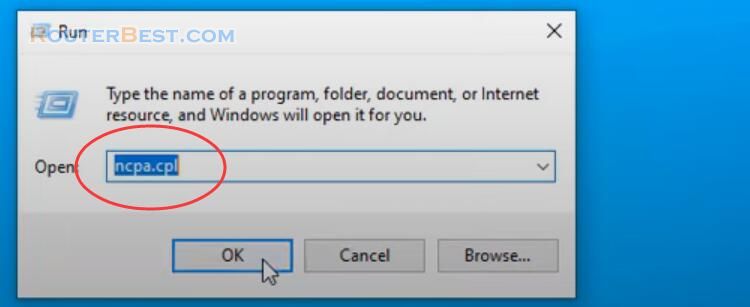
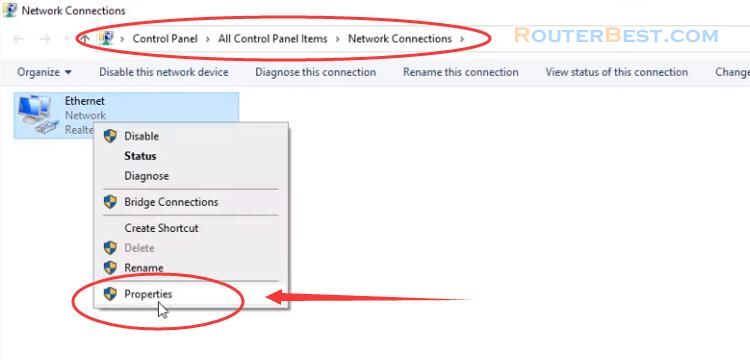
You need to enable the feature that allows you to wake up the computer via the network cable. Search "run", or right click the icon of windows in the lower left corner and select "run". Then ,open "ncpa.cpl".
Right click "Ethernet" and click "Properties".
Then, click "Configure", Switch to "Power Management", check "Allow this device to wake the computer".
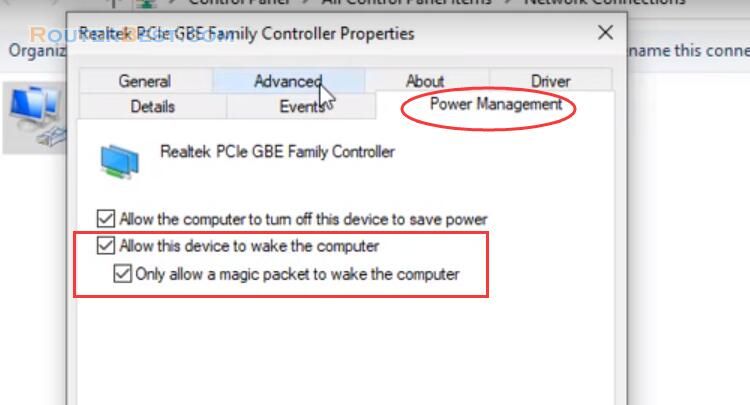
Also known as Wake-on-LAN, To do that you need to enable this feature for your network adapter.
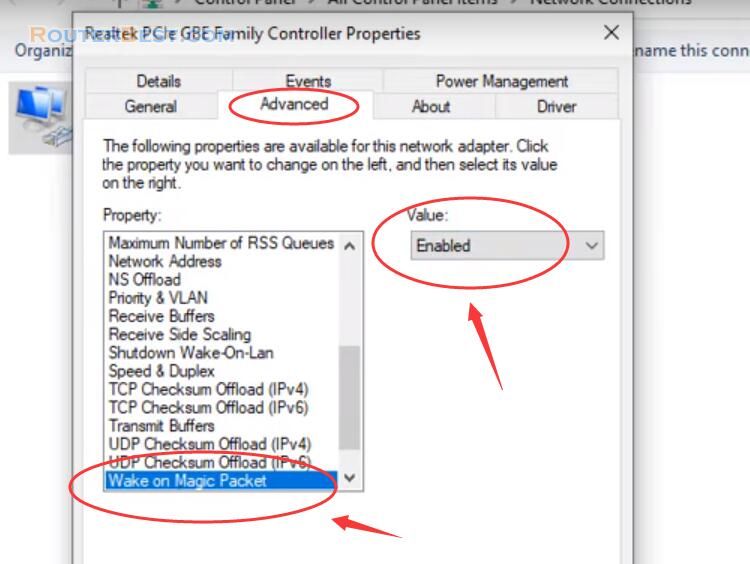
Next, you configure on your internet router to allow the computer wake up signals from the internet to pass through it.
Router Configuration
Also known as port forwarding on the router. Because computer wake-up signals are sent to the computer's MAC address, you need to binding the MAC address with an ip address that corresponds to your local ip address range.
IP and MAC Binding
The computer to be woken needs to be connected to the internet with a cable. And of course always connected to a power source. As in this example I will associate the ip address 10.11.32.41 with the MAC address of the computer.
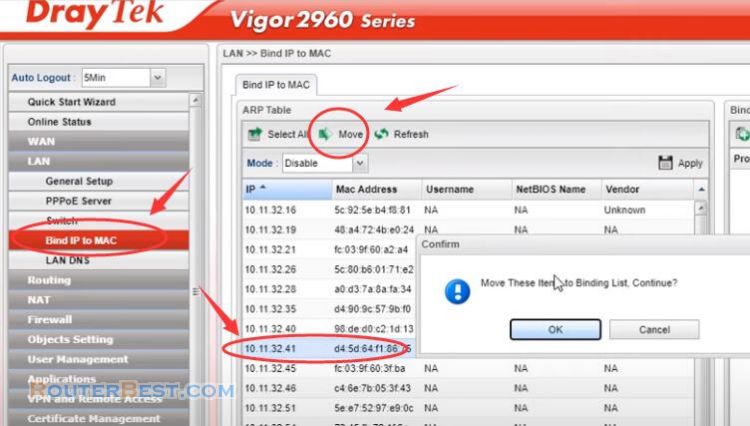
Thanks to this binding, computer wake-up signals transmitted to ip address 10.11.32.41 will be transmitted to the corresponding computer's MAC address. And for this particular case it is the MAC address of the computer that needs to be woken up. You write down the IP address and Mac address information to use for the next steps.
Port Forwarding
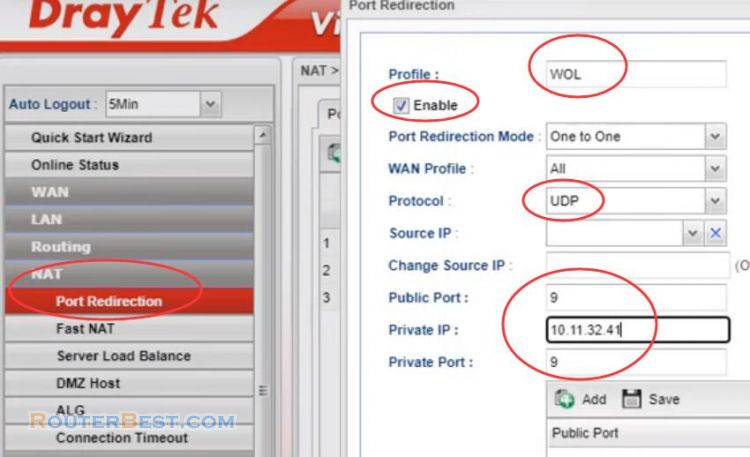
Next, you forward port 9 to the ip address 10.11.32.41 specified.
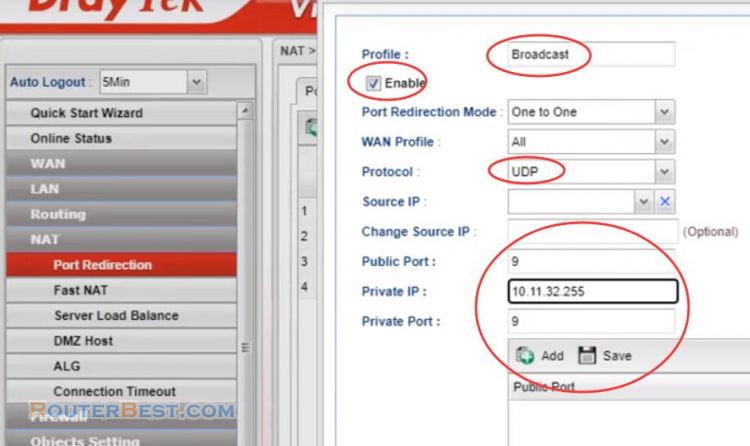
in the previous step, in addition, on some routers that support sending broadcasts to all computers behind the router, you can forward broadcast packets. If your router supports forwarding of broadcast packets, do it this way to send a packet to wake up your computer.
Dynamic DNS
To send a packet to wake up your computer, you need to determine what public IP address you are using. If your public ip address is static then great, you can skip this step. But if your public ip address is dynamic then you need to use dynamic dns service to update it automatically.
There are many dynamic dns services like no ip, duck dns, dyndns for you to choose, but in this example I choose dynu dns, it's free.
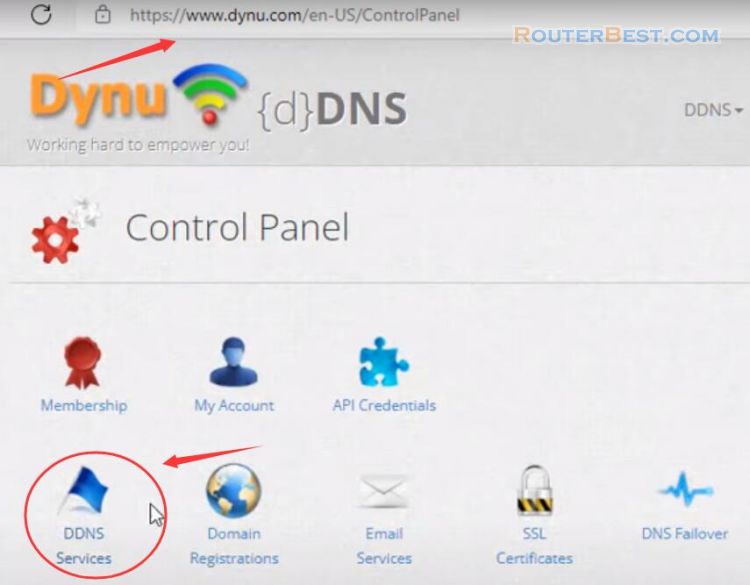
Please read "How to Share Files through Web Browsers" for specific steps.
I already created a free domain name, I will use it to update my public ip address. To update the public ip address you need to install the dynu client on Windows. After login your free account, your public ip address is automatically updated. Now you don't need to worry about Dynamic public IP address anymore.
TeamViewer
TeamViewer is commonly known to us as a remote access application, but less well known as a way to wake up a remote computer. So what do we need to do to wake up the computer with TeamViewer? You also need to create a free Teamviewer account, and log in to the Teamviewer app on the computer that wants to be woken up remotely.
WOL (Wake on LAN)
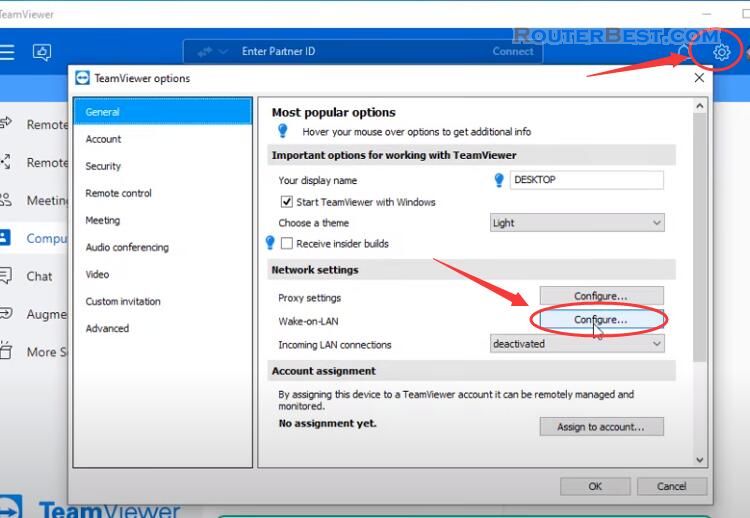
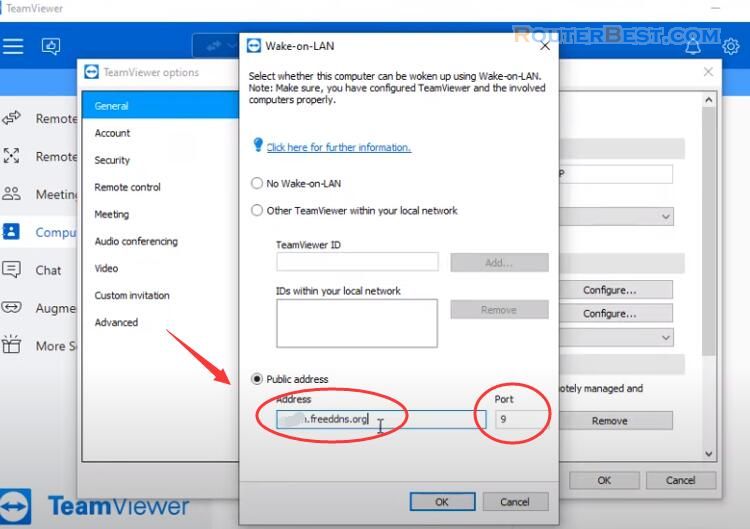
In the Wake on LAN configuration section, select the public address. Here you enter the domain name obtained from the previous step.
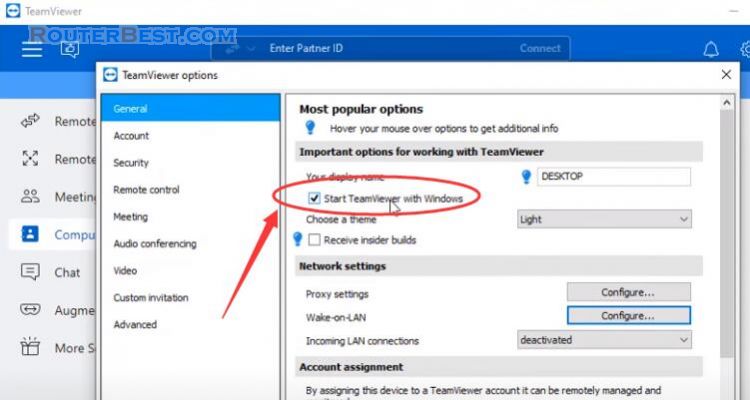
I recommend that you allow Teamviewer to start with Windows so that when the computer powers on we can control it remotely.
Password
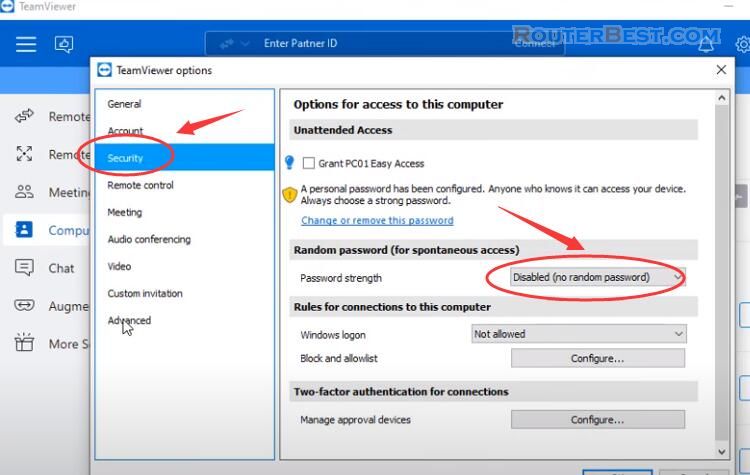
Next, you set up a separate Teamviewer password for the target computer, because normally the password will change every time the computer is powered off.
Select "Disable (no random password)".
Then, switch to "Advanced" panel to set your personal password.
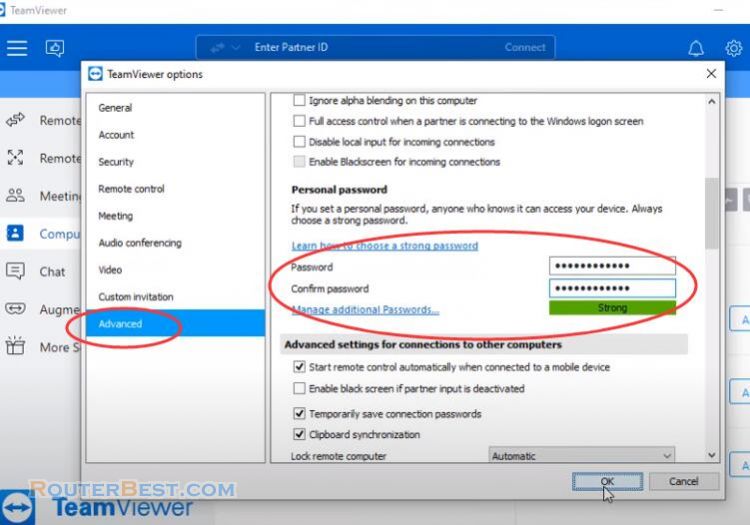
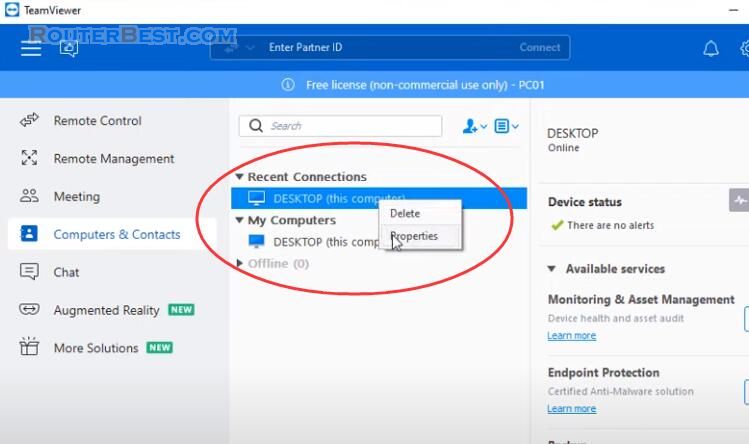
Finally you add it to your contacts, and edit the name so it's easy to remember.
Enable WOL in BIOS or UEFI
By default, the computer's motherboard will turn off the wake on lan feature so we need to enable it. With each motherboard manufacturer, there will be a different way to activate wake on lan, so you should refer to the homepage of the motherboard manufacturer.
My computer uses asus motherboard, and the activation method will be as follow. If your computer also uses Asus motherboard please follow me.
Restart your computer and press "F2" continuously. Go to "Advanced" > "Power On By PCI-E", select "Enabled".
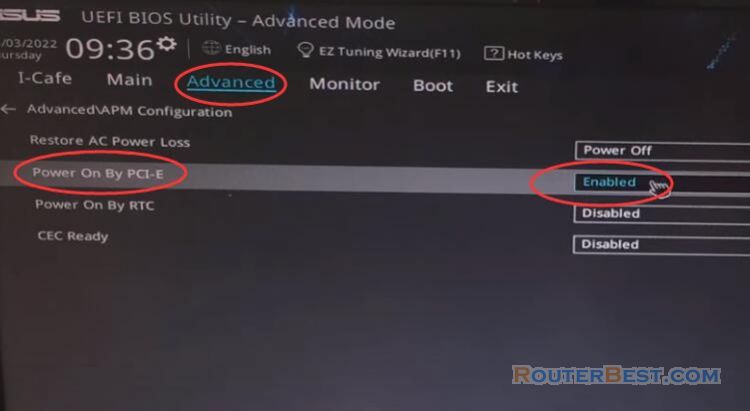
Then, go to "Exit" > "Save changes & Reset".
Phone & Windows PC Clint
After completing the necessary configurations on the target computer we will check the results. You can use your computer or smartphone to wake up your computer from anywhere via the internet.
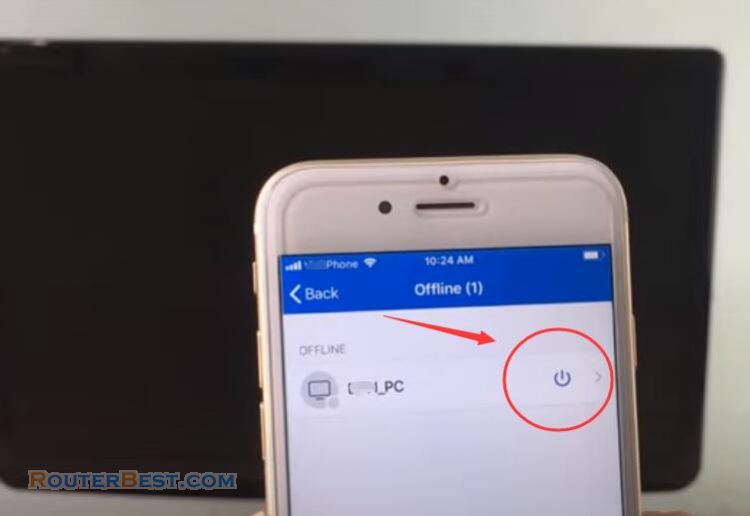
In your contacts, the target computer will appear offline status. To turn it on just click and wake up button.
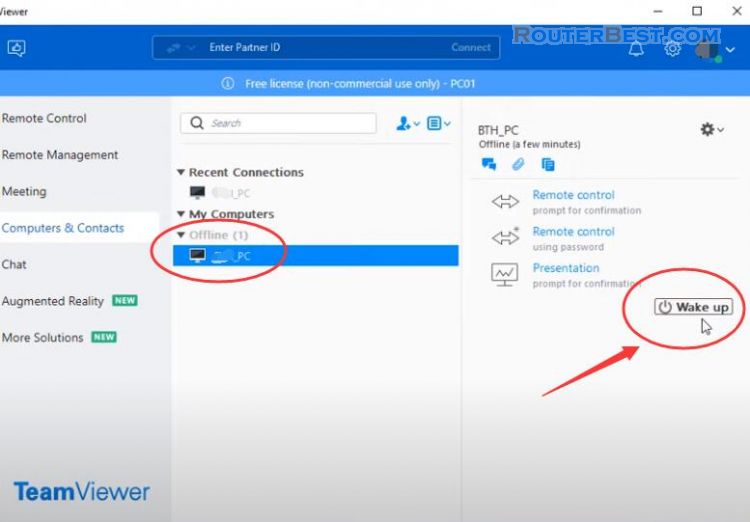
Wait a moment the computer will switch to the online State and you can remotely control the target computer.
What about smartphones? Just like the computer you log into your TeamViewer account and find the target computer in your contacts. TeamViewer can be installed on both IOS and Android so you can wake up your computer on any smartphone.
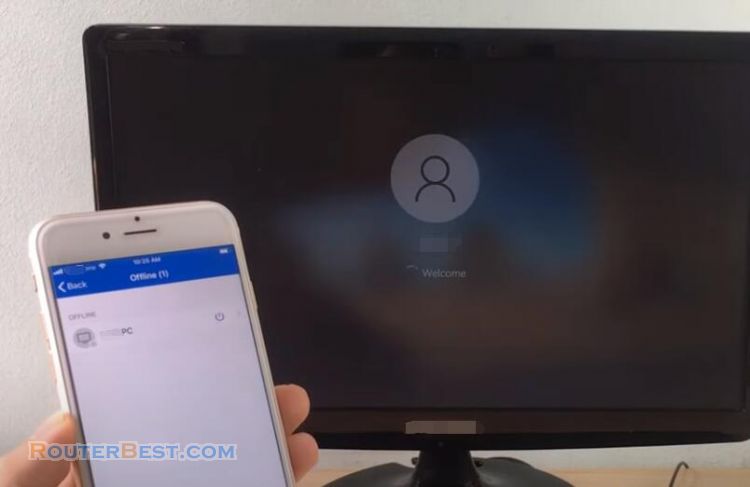
As you can see I woke up my computer from anywhere by the internet. And after waking that computer I can remotely control it. And of course I power it off then it's completely easy.
Facebook: https://www.facebook.com/routerbest
Twitter: https://twitter.com/routerbestcom
Tags: WOL TeamViewer Dynu Windows 10

