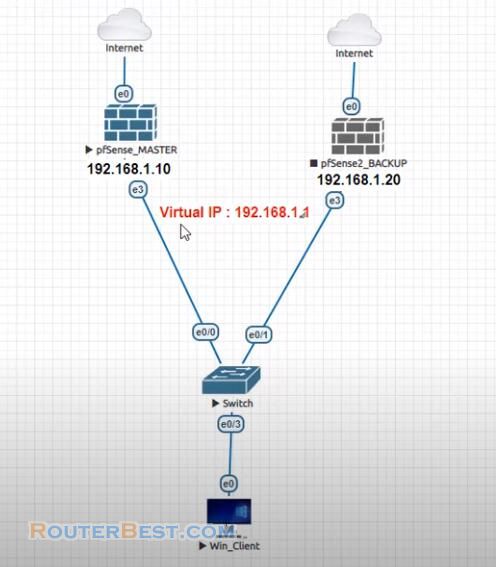
In this article, we will see How to configure High Availability Service with 2 pfSense router in cluster mode.
Log in pfSense router
username: admin
password: admin
Configuration on Master node
Before proceeding, the Lan interfaces on the cluster nodes must be configured.
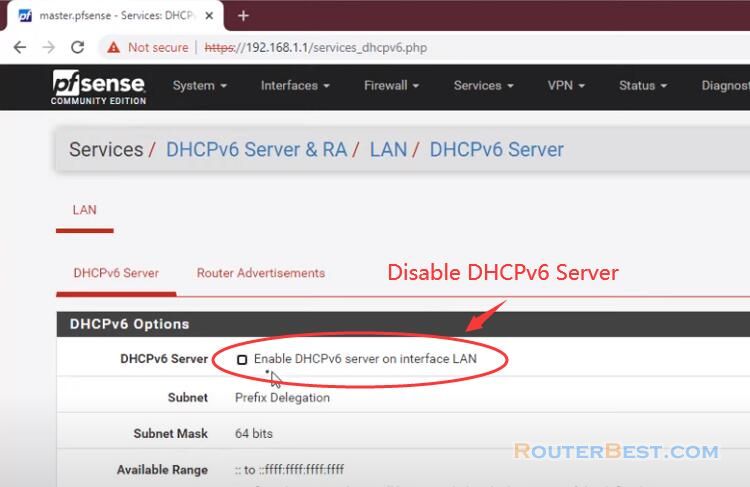
Go to "Services" > "DHCPv6 Server & RA" > "LAN" > "DHCPv6 Server", "Enable DHCPv6 server on interface LAN", disable DHCPv6 Server.
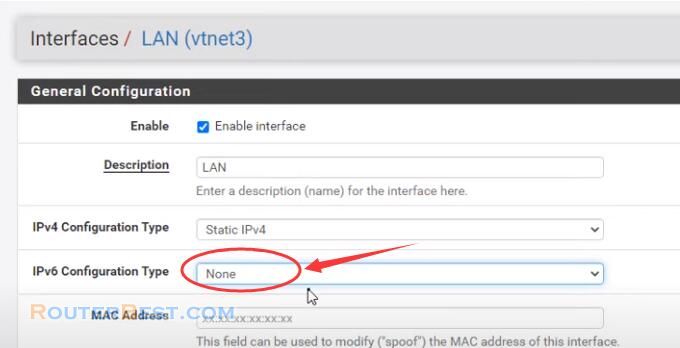
Go to "Interfaces" > "LAN".
Navigate to Interfaces and choose the interface to use on the LAN port.
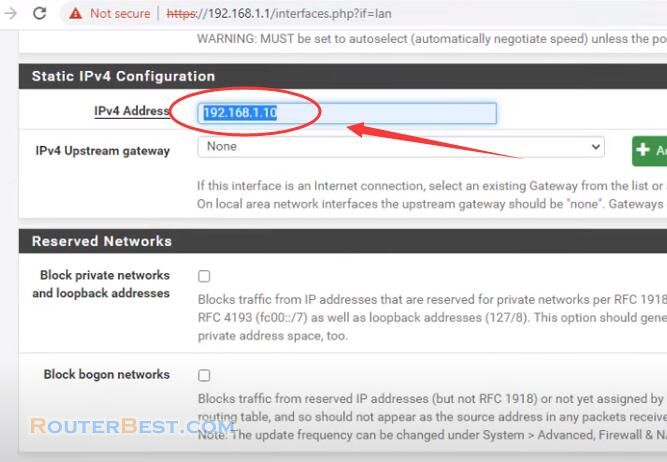
Set IPv4 address to 192.168.1.10 when configuring the primary node.
Configuration on backup node
Turn on the second pfSense Router, log in it with 192.168.1.1. Navigate to Interfaces and choose the interface to use on the LAN port. Set IPv4 address to 192.168.1.20 when configuring the backup node. Just like Master node.
Configure pfsync
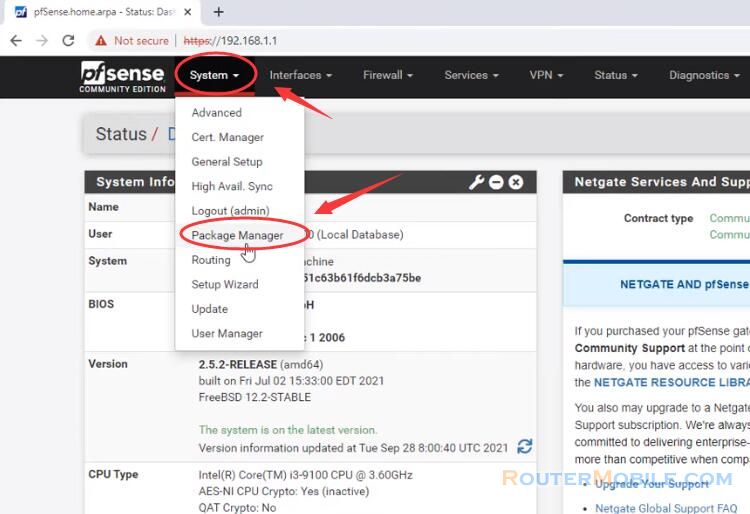
Navigate to "System" > "High Avail Sync".
Check Synchronize States.
Set synchronize interface to LAN.
Set pfsync Synchronize Peer IP to the backup node, set this to 192.168.1.20.
Set Synchronize Config to IP to the Sync interface IP address on the backup node, 192.168.1.20.
Set Remote System Username to "admin".
Set Remote System Password to the admin user account password, and repeat the value in the confirmation box.
Check the boxes for each area to synchronize to the secondary node. For this article as with most configurations all boxes are checked.
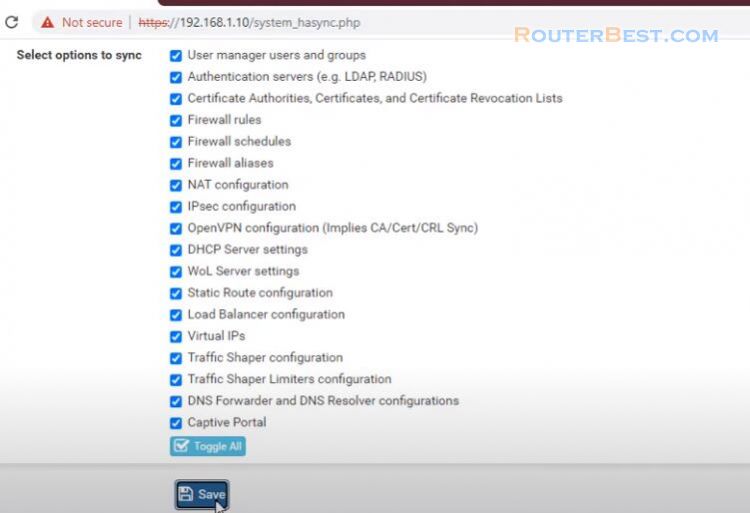
Let's try to change the configuration on the primary node and see the synchronization on the backup node.
Go to "Services" > "DHCP Server" > "LAN", set DNS server : 8.8.8.8, 8.8.4.4.
The two nodes are now linked for configuration synchronization! With configuration synchronization in place, the CARP Virtual IP addresses need only be added to the primary node and they will be automatically copied to the secondary.
Defines the type of VIP as CARP
Defines the interface as LAN
The Address box is where the IP address values are entered for the LAN VIP CARP, For this example enter 192.168.1.1.
Sets the password for the CARP VIP.
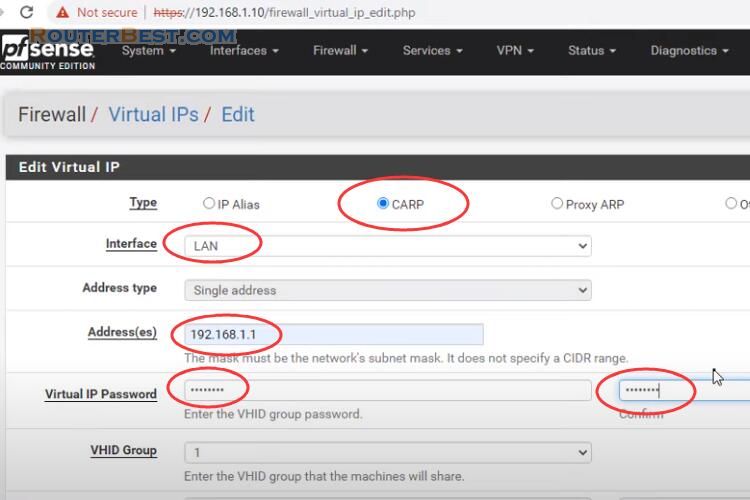
CARP Virtual IP address has been automatically copied to the secondary node. Skew in primary node is usually set to 0 or 1, secondary nodes will be 100 or higher. This adjustment is handled automatically by synchronization.
Confirm the proper status
Now visit "Status" > "CARP" on both nodes to confirm the proper status. The primary node should indicate MASTER status for all VIPs, and the secondary node should indicate BACKUP status for all VIPs. The DHCP server on the cluster nodes need adjustments so that they can work together.
Set the Gateway to the LAN CARP VIP, here 192.168.1.1.
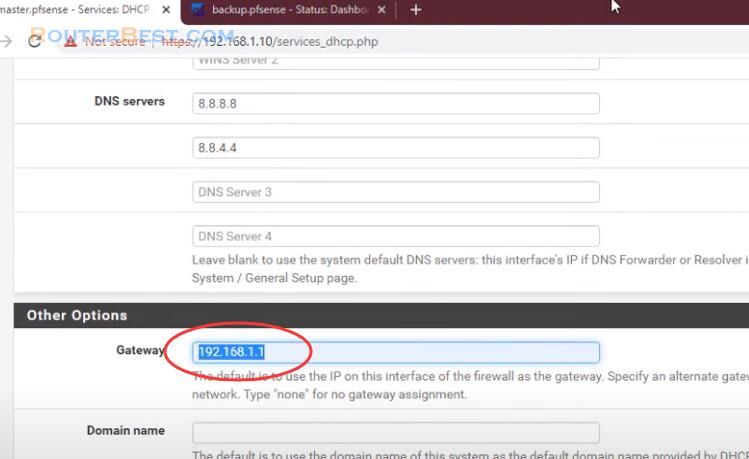
This way if the primary fails, the local clients will continue talking to the secondary node.
Next to test the proper functioning of the high availability. Stop the primary pfSense. Traffic now passes through your backup pfsense node as expected.
Facebook: https://www.facebook.com/routerbest
Twitter: https://twitter.com/routerbestcom
Tags: pfSense 192.168.1.1

