This article explains How to turn TrueNAS into Cloud storage with Nextcloud. You build your own cloud with nextcloud but afraid of hard drive failure and data loss, to fix that you should install Nextcloud on TrueNAS.
Set up DNS and gateway IP address for TrueNAS
First you set up DNS and gateway ip address for truenas. You need to do this to avoid errors when installing nextcloud.
Go to "Network" - "Global configuration".
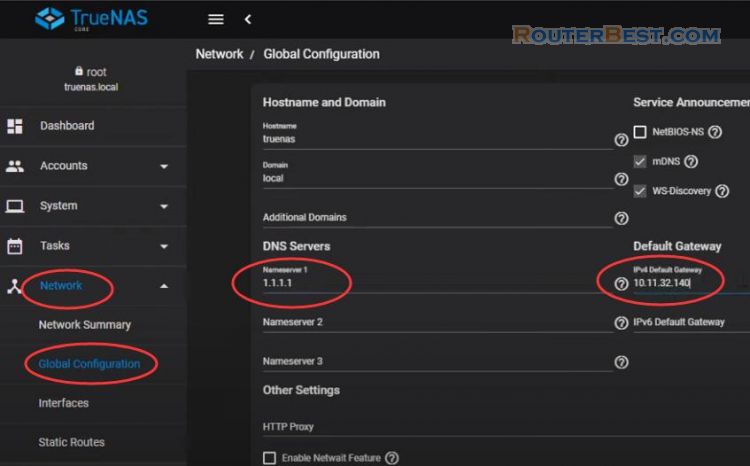
If you haven't set a static ip address for truenas, I recommend you to do it.
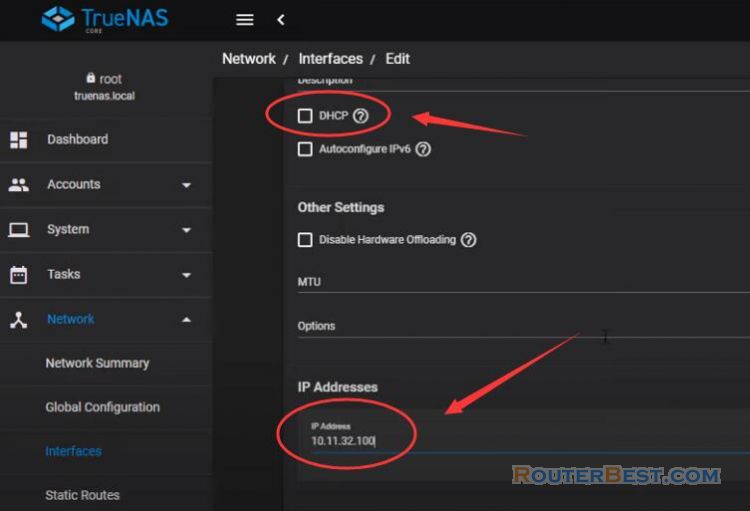
Go to "Network" - "Interfaces", then, edit "re0".
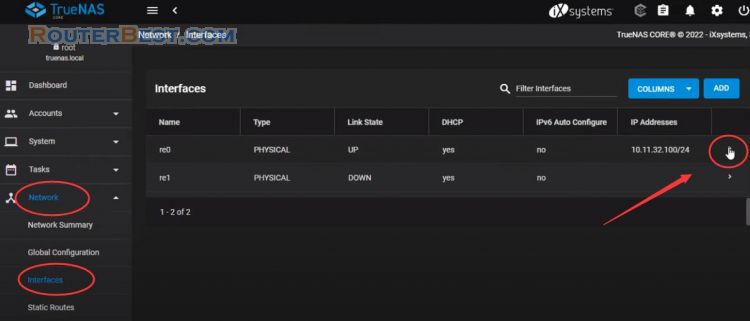
Here I assign truenas ip address 10.11.32.100.
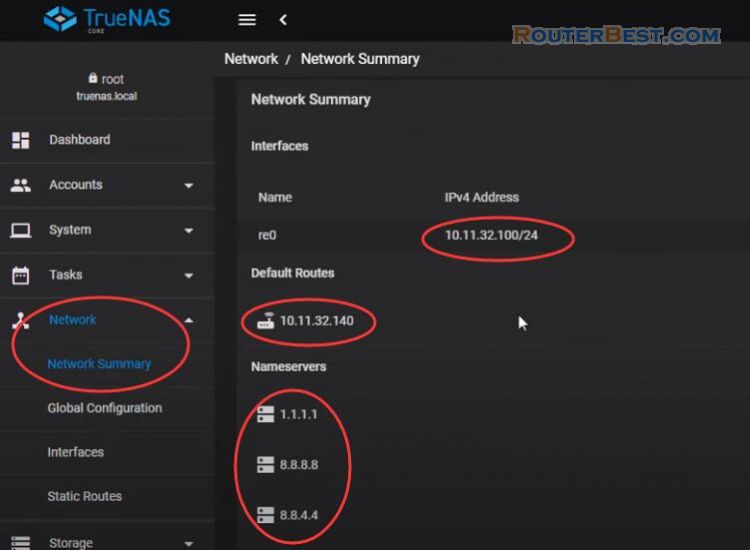
And here is the ip address, gateway and dns I have set up on truenas.
Install Nextcloud
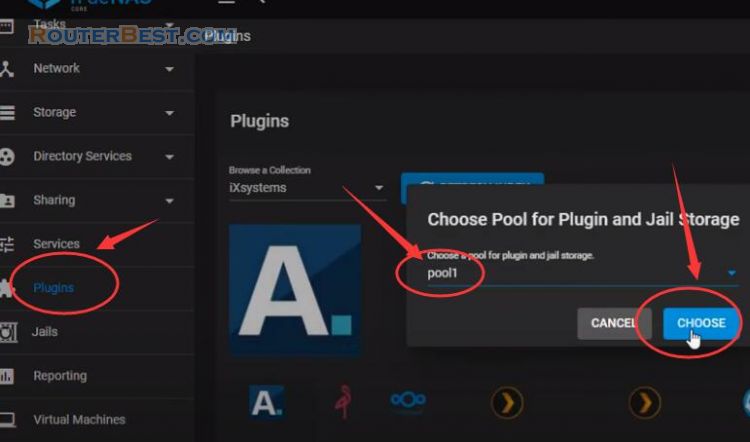
To install nextcloud, click on the plugins in the left menu. You choose the storage location when installing nextcloud. Like here I choose pool1 to install nextcloud.
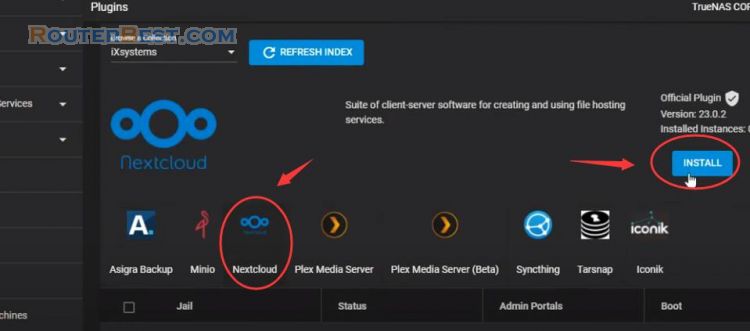
Here you name it so that it is easy to remember and as you want, in this example I named it nextcloud. I want to assign nextcloud a private ip address so I choose DHCP and uncheck NAT.
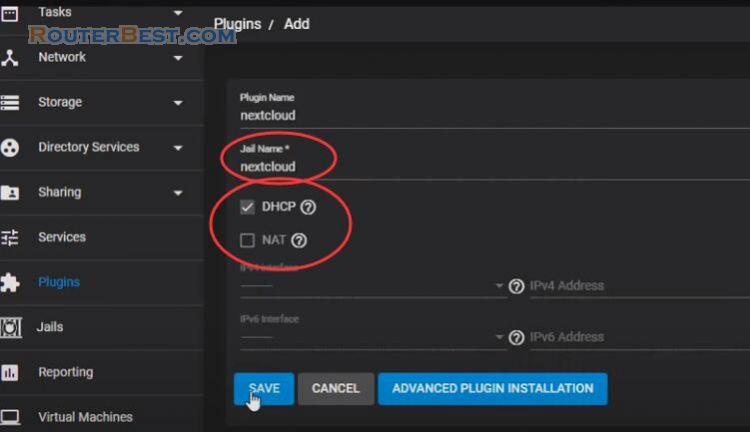
Please wait patiently for about 20 minutes for the installation to complete. So that nextcloud has been installed, the next steps we will set up to be usable.
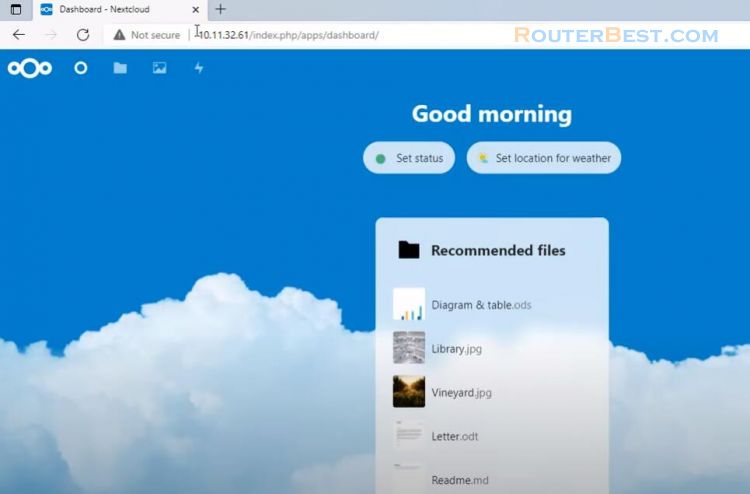
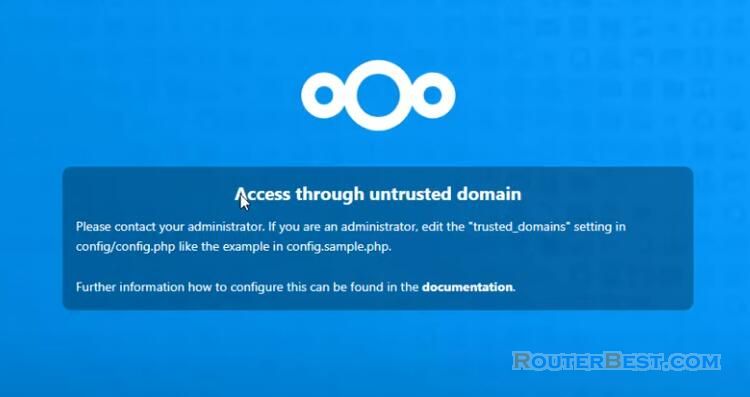
We will open the management page by clicking on the manager or entering the ip address of nextcloud in any web browser. By default nextcloud will report this error and we will fix it.
You click "Jails" in the left menu and open the command window of nextcloud.
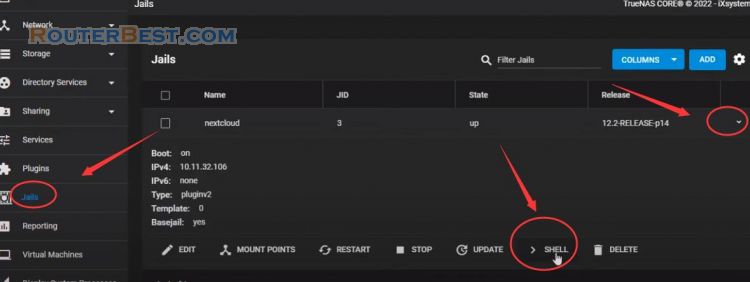
To fix the error you encounter, edit the configuration file of nextcloud. You use the ee command to edit the config.php.
ee /usr/local/www/nextcloud/config/config.php
If you paste the command, you need to use a combination of "shift and insert". You scroll down and find the trusted domain block and fix it like I am. You can add individual addresses and domains, but I'll allow all, so I added the star character.
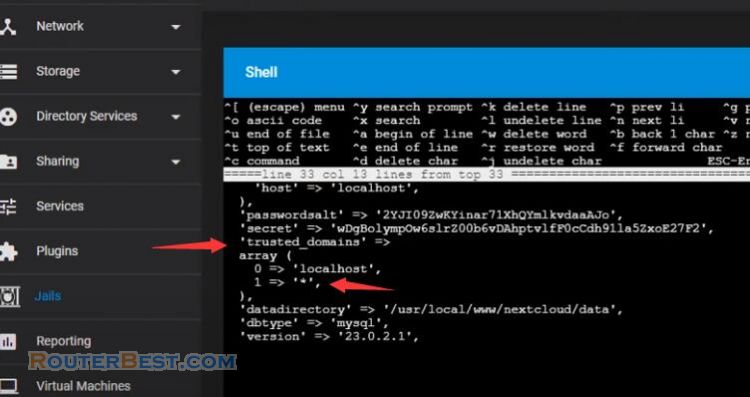
To close the configuration file you use the Esc key and don't forget to save the changes. And now the error message is gone.
While installing nextcloud, will generate random password, you use it to access nextcloud. The random password is long and hard to remember so you should change it to a more suitable password. Of course, I recommend setting up a strong enough password to keep your data safe.
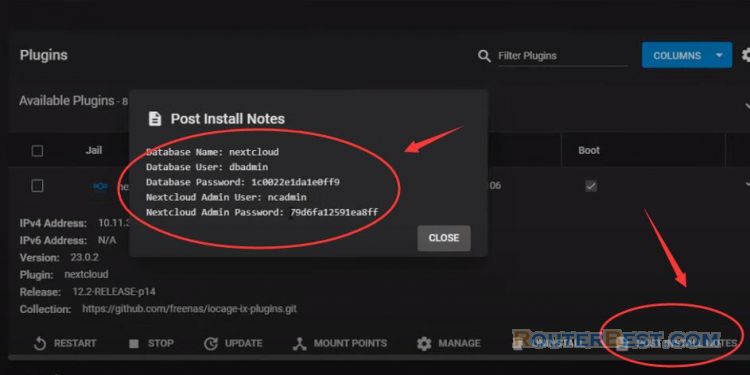

So we have nextcloud cloud but we can only use it in local network. To be accessible from anywhere, we will need the domain name and port forwarding.
Domain Name
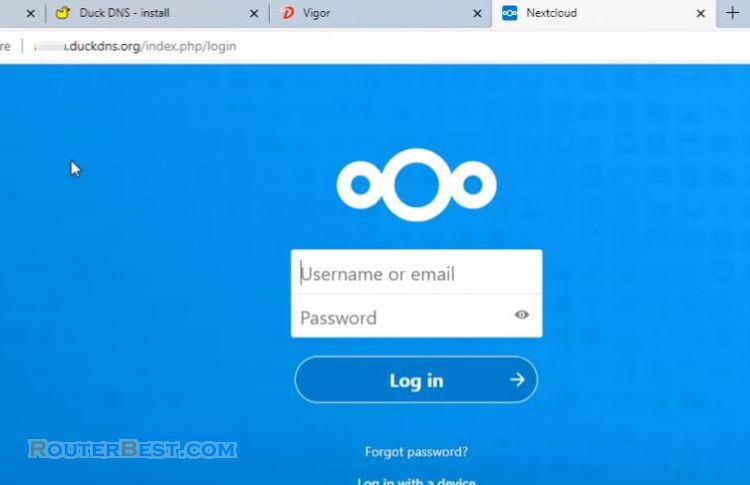
First of all, I use DuckDNS to assign nextcloud a domain name. In this example I create a free domain name routerbest.duckdns.org. I will write down this domain for cloud access in the next steps. You can configure on truenas to automatically update the public ip address. Want to do that you use Cron Jobs.
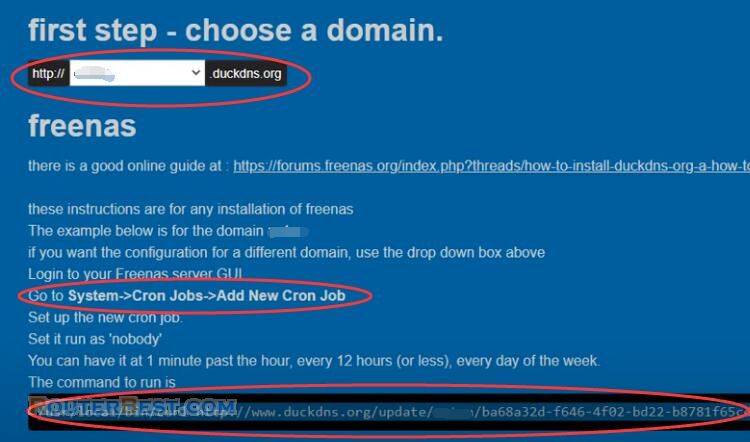
According to the instructions on the duckdns website, you copy and paste the command as I am doing. Remember to choose nobody as instructed. You can customize the public ip address update schedule like hourly, daily, weekly, monthly.
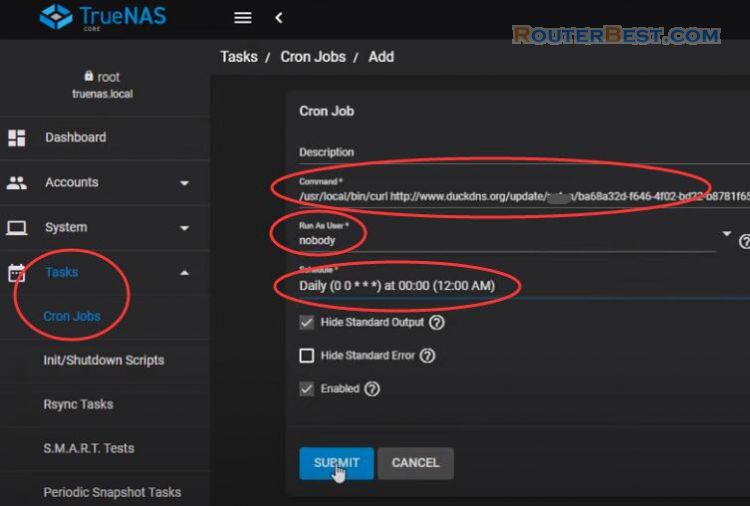
To use it, I choose to run now. But that is not enough to be able to access nextcloud from the internet. To do that, you need to forward the port on the router. As here nextcloud ip address is 10.11.32.106. You can do port forwarding on most routers.
Port Forwarding
First, forward port 80 to ip address 10.11.32.106, You can do port forwarding on most routers.
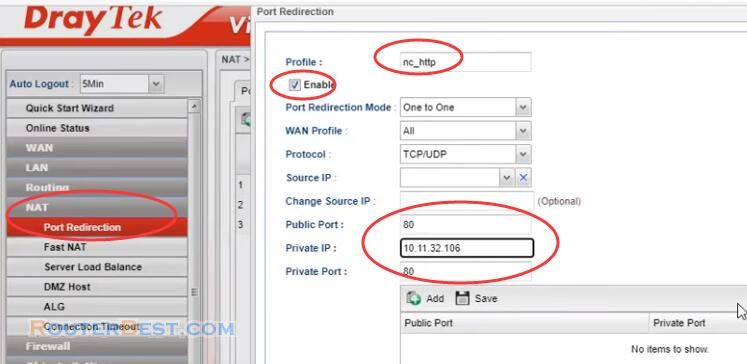
Second, port forwarding, forward port 443 to ip address 10.11.32.106.
After obtaining the domain name and port forwarding we can access the cloud from anywhere over the internet. I've basically finished guiding you to get a private cloud with TrueNAS.
Https
The next steps will help you keep this cloud more secure. As you can see nextcloud is using self signed certificate so it is not secure so I will use let's encrypt. You open the nextcloud configuration command window. Since nextcloud is using nginx, we will go through the steps to install enable encryption on nginx.
portsnap fetch
portsnap extract
cd /usr/ports/security/py-cerbot-nginx
make install clean
certbot --nginx -d your_domian
- Renew
/usr/local/bin/certbot renew
ee /usr/local/etc/nginx/nginx.conf
service nginx restart
So we have finished encrypting the communication between the user and the nextcloud server. By default certificates are only valid for 90 days so you need to schedule auto-renew. You create a new cron job to renew the certificate. As well as how to update the public ip address, you have options for automatic renewal every hour, day, week, and month.
When installing nextcloud i choose DHCP, so over time the ip address will change. The next steps will assign a fixed ip address to nextcloud.
Static IP Address for Nextcloud
You open the command prompt and edit the file rc.conf.
ee etc/rc.conf
Here you enter your static ip address and your gateway ip address. I assign static ip address as 10.11.32.106. The gateway ip address is 10.11.32.140.
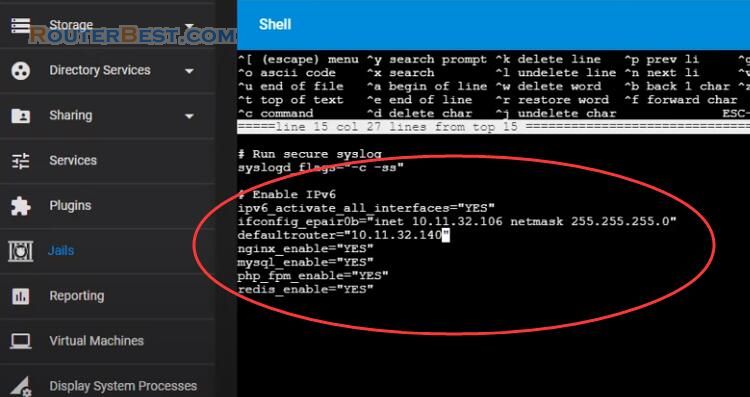
Don't forget to save your changes when you close the rc.conf file. If you want to change the dns address, edit the file resolv.conf.
ee etc/resolv.conf
I add the address 1.1.1.1 to the list of DNS addresses. Don't forget to save your changes when you close the resolv.conf file. Then don't forget to reboot for the changes to take effect.
service netif restart && service routing restart
So your ip address will be permanently assigned to your cloud. If you don't want to use complicated commands that can be configured on the router to get a fixed ip address for your cloud. It's ip address and mac address binding. This feature is available on most routers. You just need to select the ip address and mac address in the list of assigned ip addresses on the router and bind them together. With this configuration, your ip address will not be changed over time.
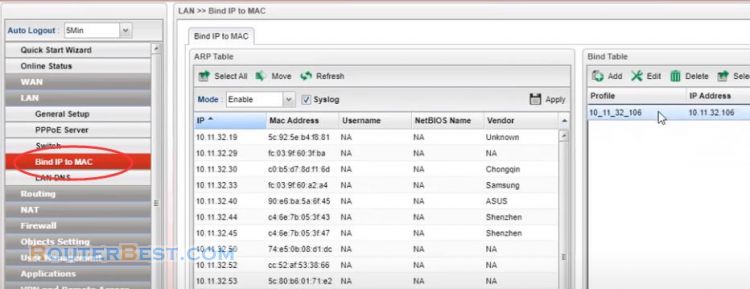
So the nextcloud cloud was built, You can now connect to next cloud from your computer or smartphone.
Facebook: https://www.facebook.com/routerbest
Twitter: https://twitter.com/routerbestcom

